We walk through how to set up SMTP on your Kyocera Multifunction Device. Setting up your Kyocera MFP SMTP settings will allow you to scan to email from your multifunction copier. Editing the SMTP settings on a Kyocera Multifunction Printer (MFP) is essential for configuring email functionality, enabling features such as Scan-to-Email.
Here is a great video from Sam, our lead product trainer, on how to edit the SMTP settings on your Kyocera MFP
Video: Kyocera SMTP setup
SMTP settings and setup should be done through advanced users or IT professionals since making changes in the SMTP can cause scanning interruptions.
1. Type your machine’s IP address into the URL bar of a web-browser #
The easiest way to make changes to your SMTP is through your MFP copier’s web interface. We access this through a web portal in which you will need to know your MFP copier’s IP Address.
(If you do not know your machine’s IP address, see our guide here: How to find your IP address)

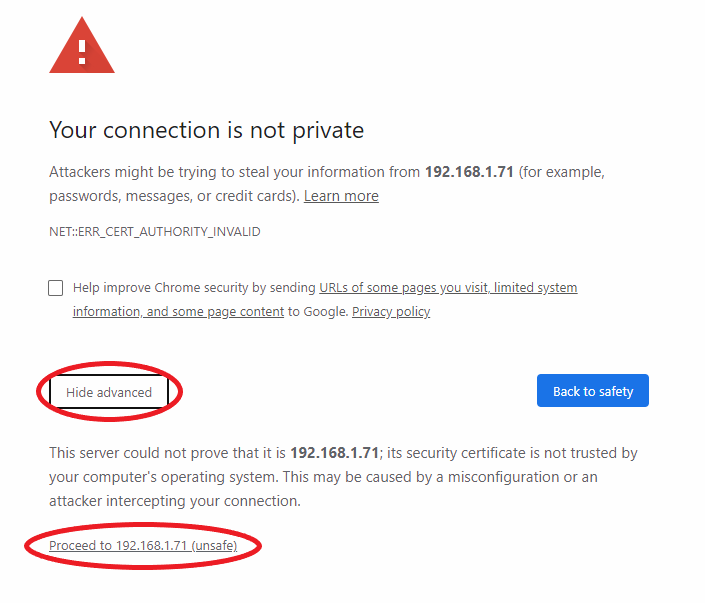
2. You will receive a certificate error. Press ‘Show Advanced’ and then ‘*Proceed to *Your IP address*’ #
(This example is from Google Chrome. If using another web browser, your certificate error will look slightly different. Just make sure to proceed to the site.)
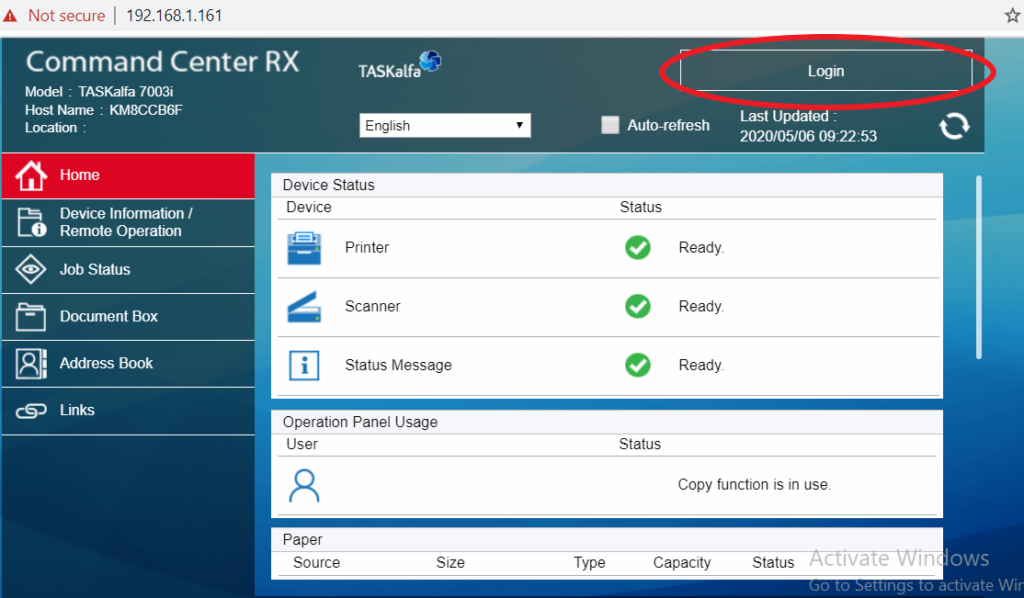
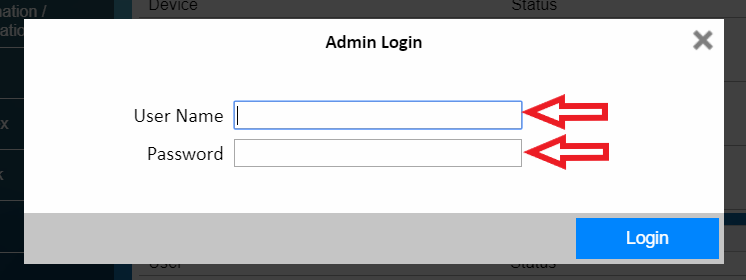
3. Login with your Kyocera Command Center RX with Kyocera Admin creditionals #
(The picture below is just an example. For administrator credentials, please reach out to your IT administrator or your Kyocera Service Provider)
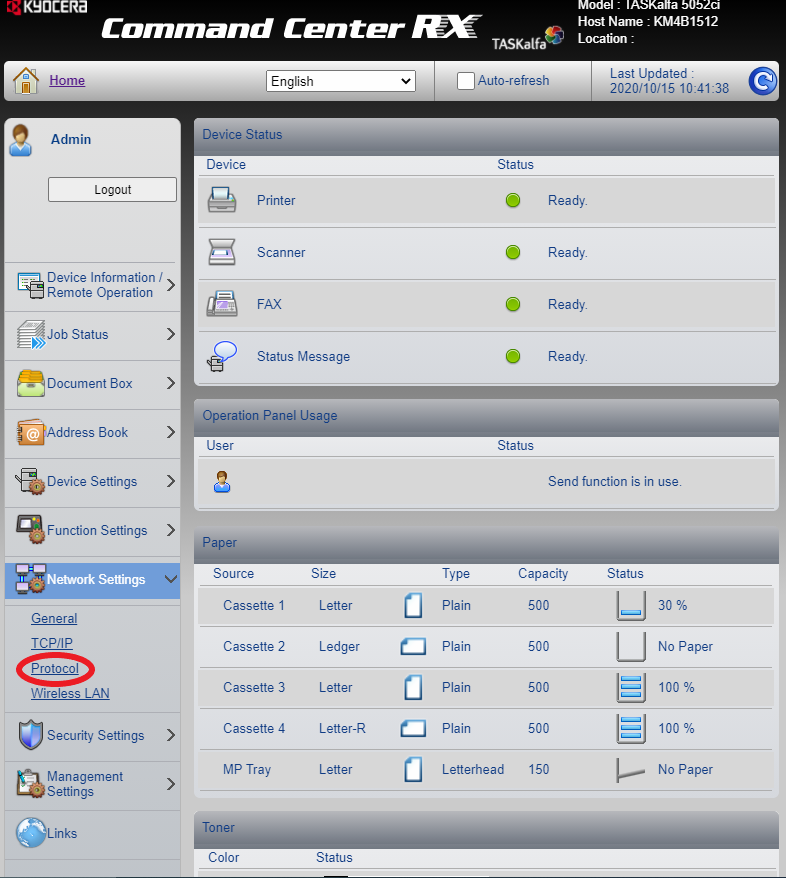
4. Highlight ‘Network Settings’ and click ‘Protocol’ #
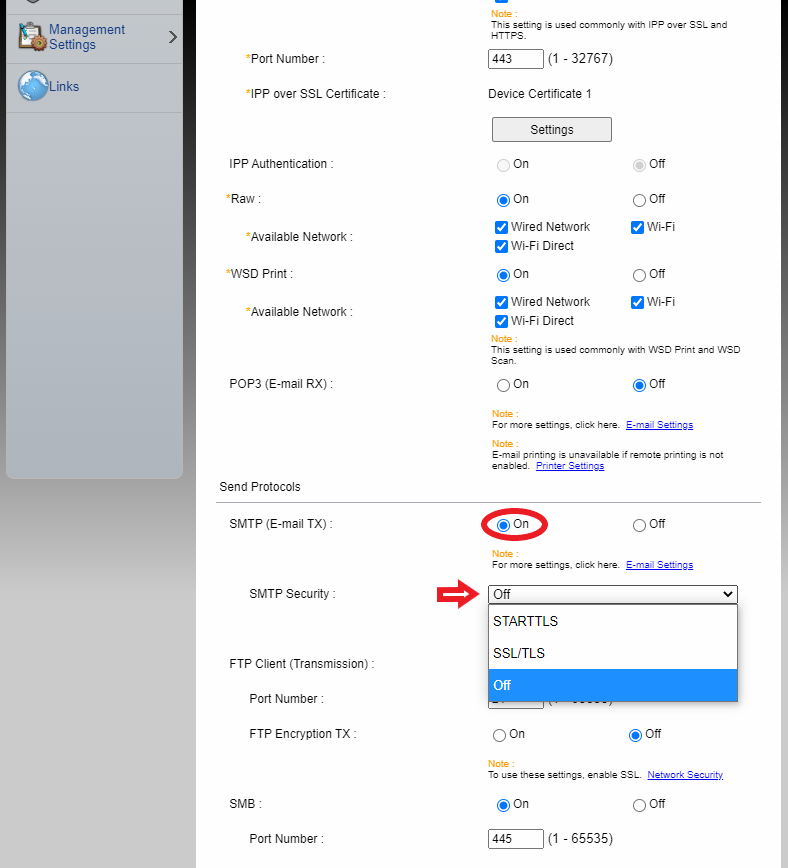
5. Scroll down, set ‘SMTP (Email TX)’ to ‘ON’, and select the necessary SMTP Security #
(Press ‘Submit’ at the bottom of the page when you are finished.)
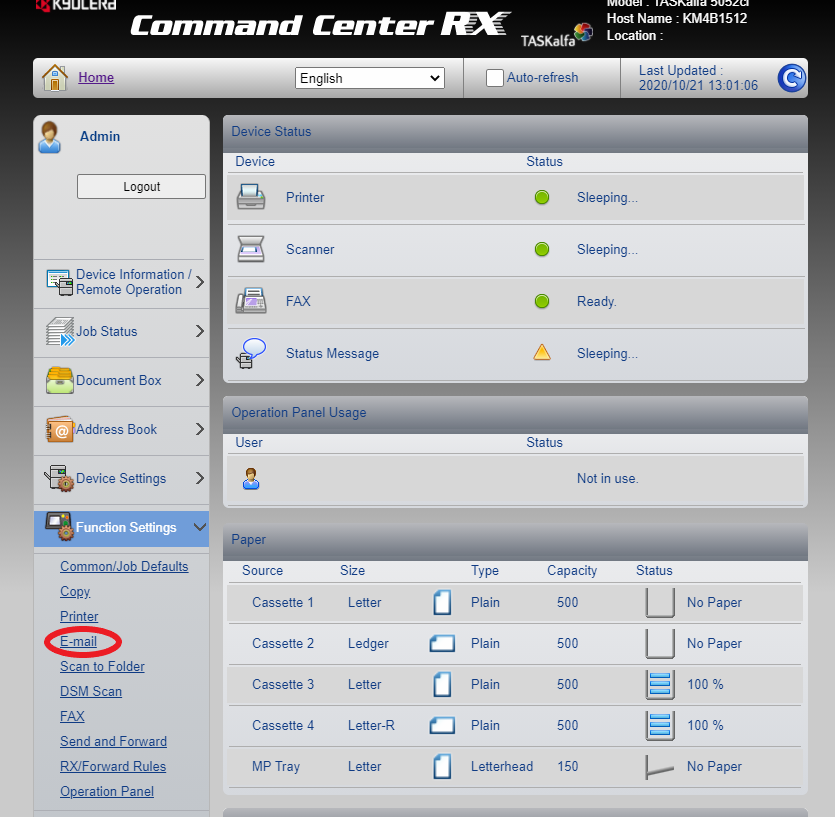
6. Highlight ‘Function Settings’ and click ‘E-mail’ #
7. Fill out the ‘Server Name’, ‘Port Number’, ‘Sender Address’, and press ‘Submit’ #
Each of these SMTP Ports uses a different security SMTP protocol.
(You may need to also fill out Authentication Protocol, Login User Name, and Login Password as well if you have SMTP security enabled.)
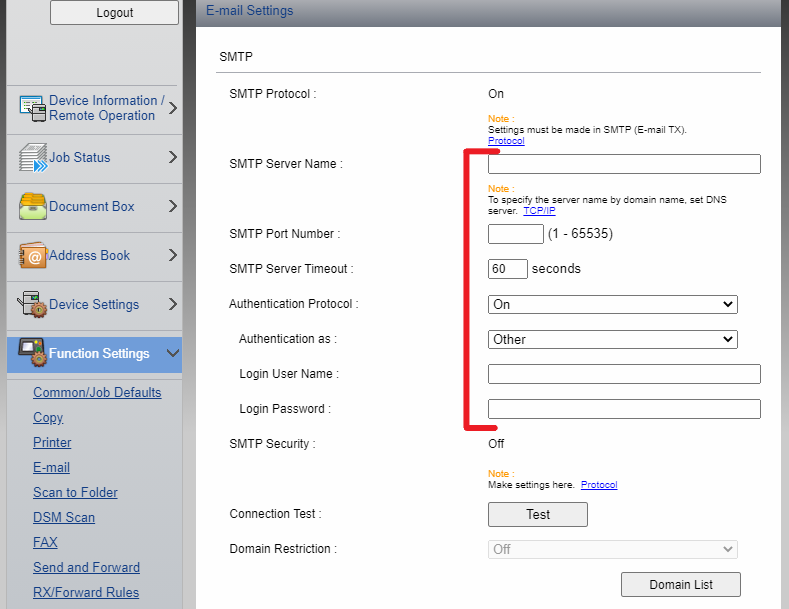
7a. You may test the connection with the ‘Test’ button #
Press the test button below and your Kyocera TASKalfa will attempt to communicate with the mail server using the SMTP settings provided.

Additional Tips for Kyocera SMTP setup
- Gmail Users: Ensure “Allow less secure apps” is enabled in your Gmail settings (or create an app password if using two-factor authentication).
- Firewall: Ensure the necessary SMTP port is open on your network.
- Consult Your Copier Provider: For specific server details or credentials.


