This article will walk through how to print from the multipurpose tray on the Kyocera MFP printer.
1. Load the MFP’s Multi-purpose tray with the correct paper #
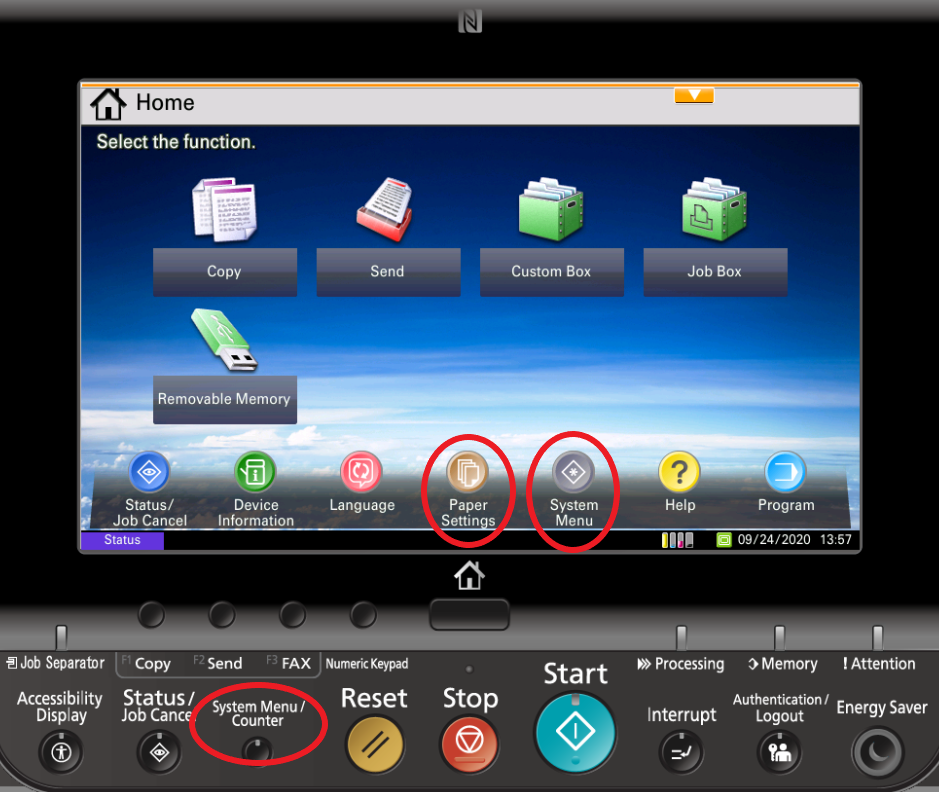
2. Press the ‘System Menu’ button #
From the homescreen of your Kyocera MFP, select System Menu button.
(If you have the ‘Paper Settings’ button on your home screen, press that instead and skip to step #4)
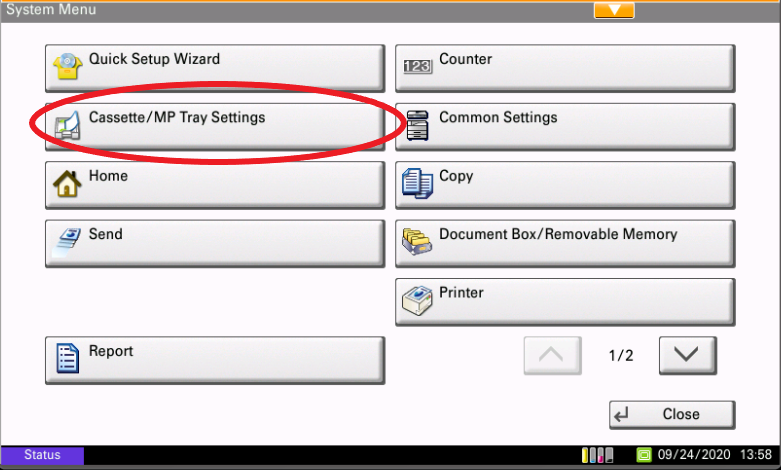
3. Press the ‘Cassette/MP Tray Settings’ button #
Once you are in the System Menu navigate to the Cassette/MP Tray Settings of your Kyocera MFP and click.
Sign up for more great tips and helpful solutions from BDS!
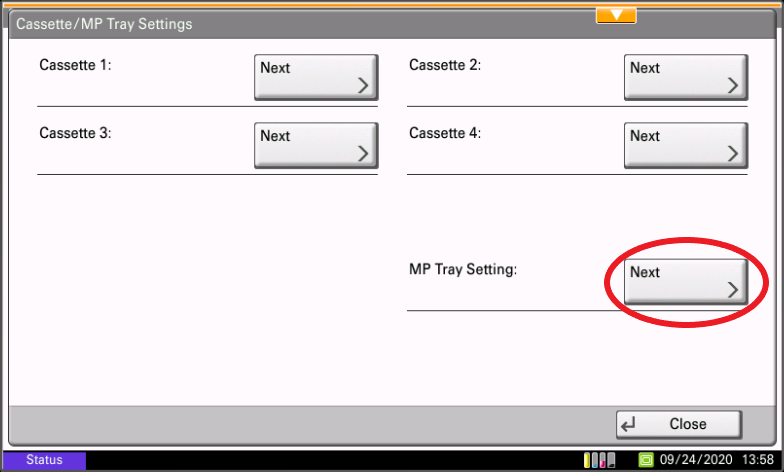
4. Press the ‘MP Tray Settings’ button #
In the Cassette/MP Tray Settings locate MP Tray Settings and click next.
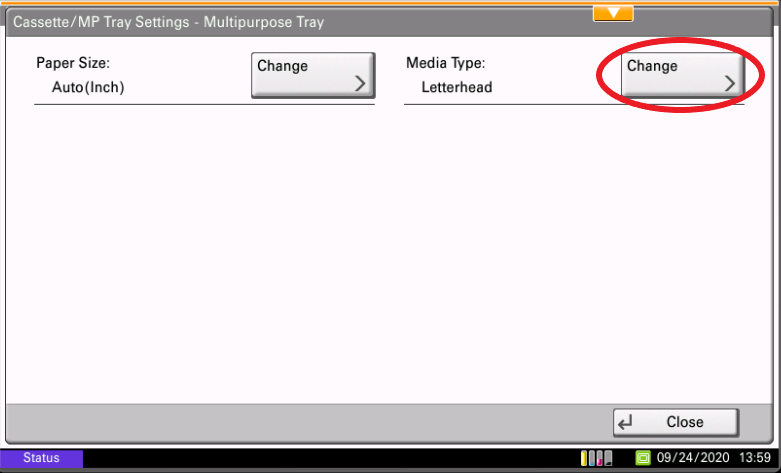
5. Press the ‘Change’ button to set Media Type #
Quick Tip: You want to make sure the paper type listed here is the paper type that you loaded into the MP tray and intend to print on!
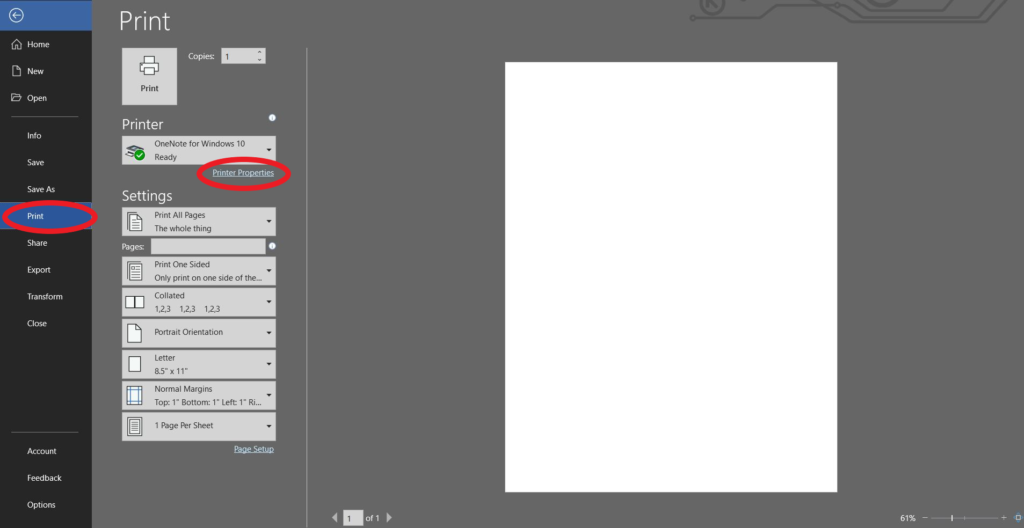
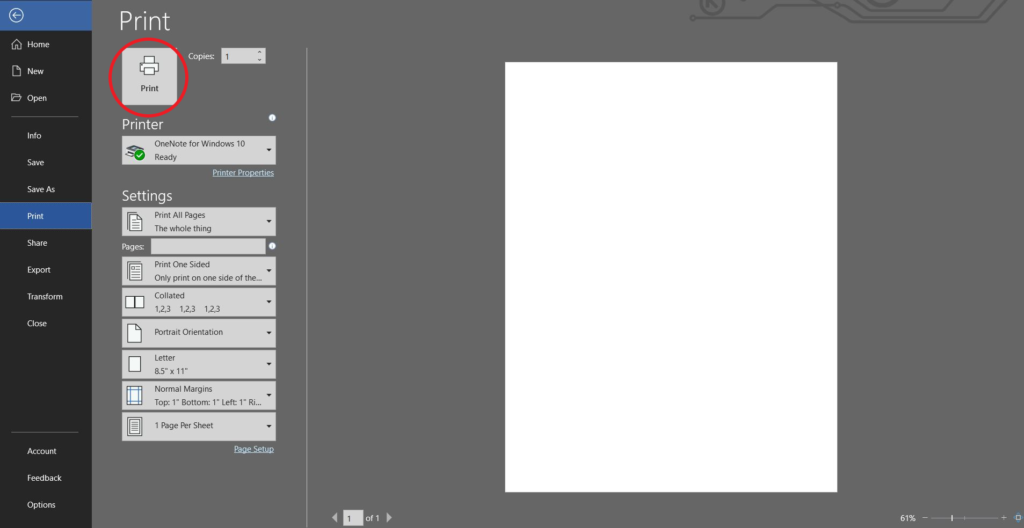
6. Select ‘Print’ on your document then press ‘Printer Properties’ #
(In this example I used Microsoft Word. Yours may look a little different depending on the document you’re trying to print)
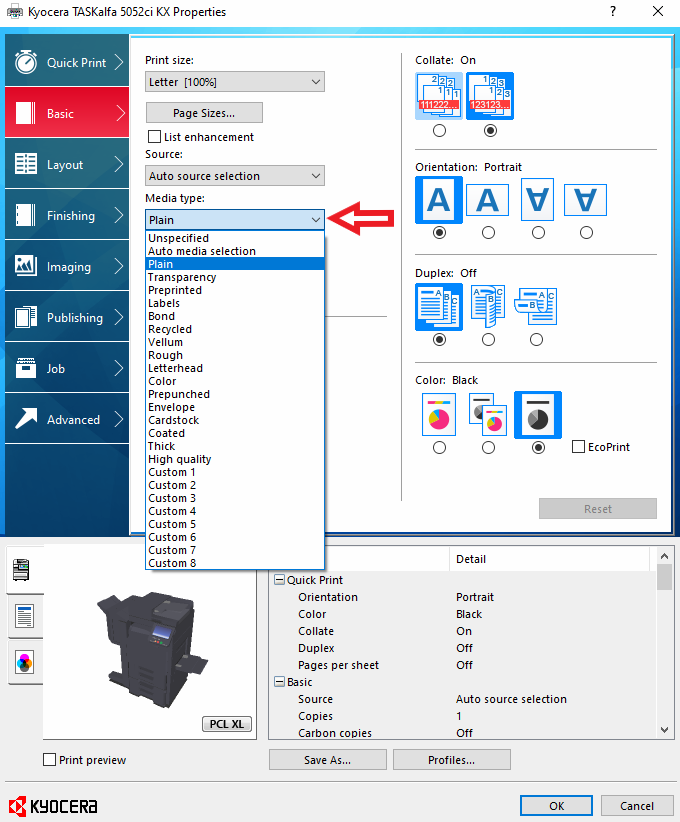
7. Choose the ‘Media Type’ #
(Its very important to make sure the Media Type matches what you are using as well as what the copier is set to)
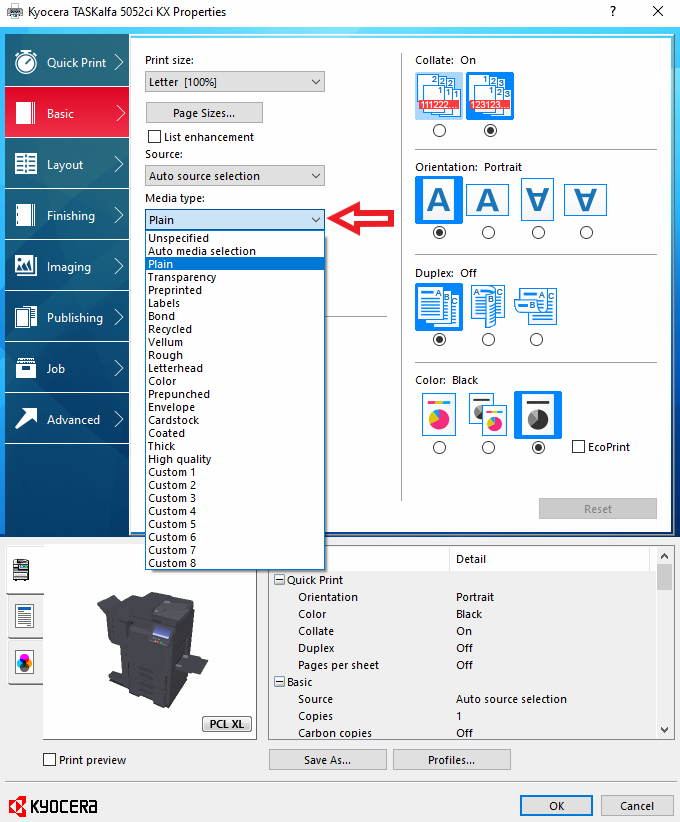
8. Choose the ‘Multipurpose Tray’ as the source #
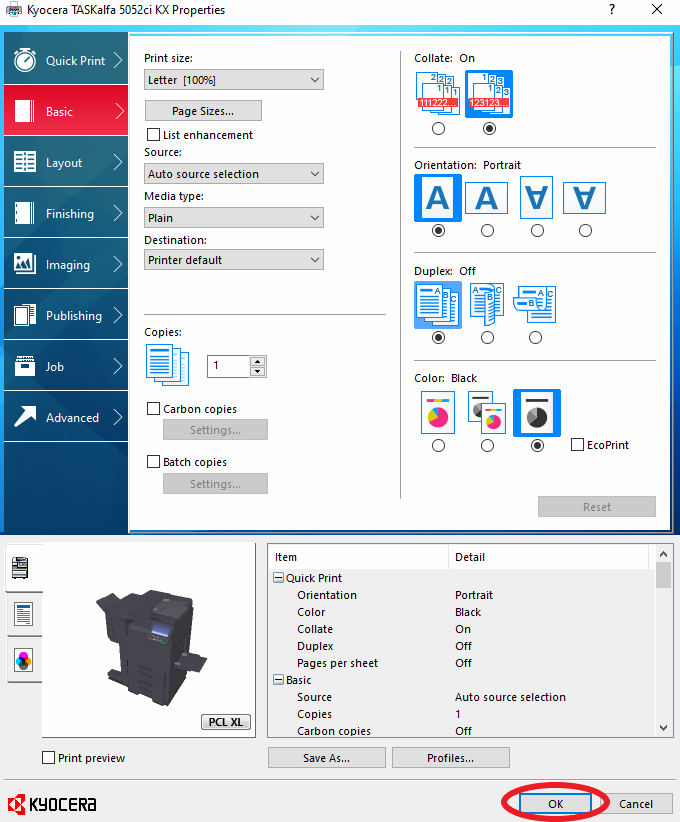
9. Press ‘OK’ at the bottom #
10. Press ‘Print’ #
You’re done!


