Here is a great video from Sam demonstrating how to scan to a folder from the machine’s Control Panel.
First of all, make sure that you have created your network shared folder and added it to the address book. If you are unsure how to do this, see our guides on How to Create a Network Shared Folder and How to Add a Scan-to-Folder Entry
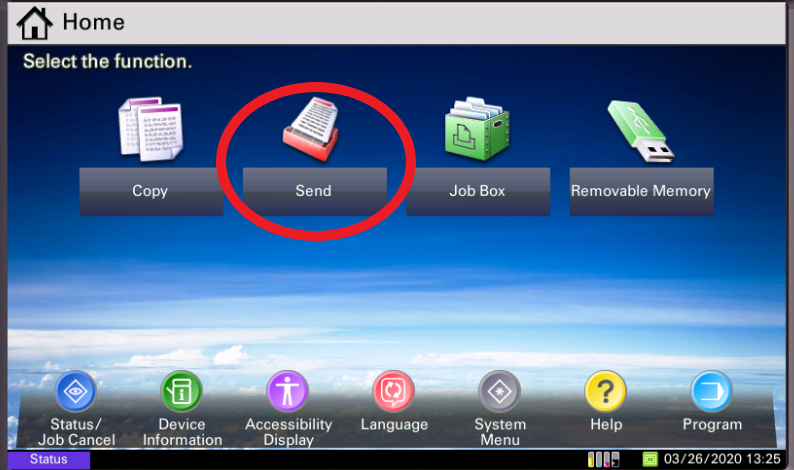
1. Press the ‘Send’ button #
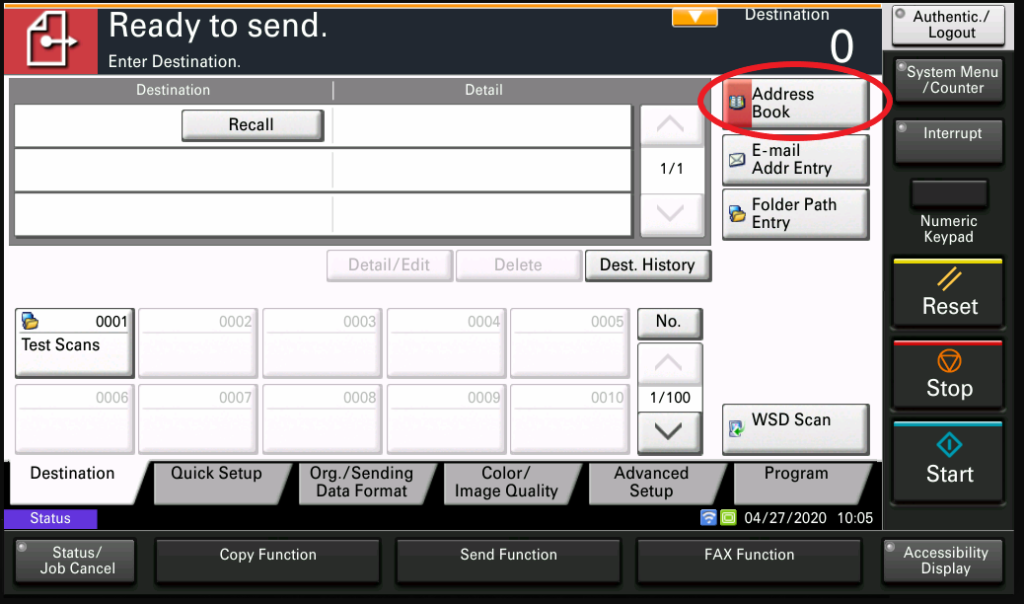
2. Press ‘Address Book’ #
(Depending on how your machine is set up, you may have to press the ‘Address Book’ button or it may open right up. If it didn’t open, press the ‘Address Book’ button and scroll to the scan destination you would like. You may have to use the arrow buttons to find your scan destination.)
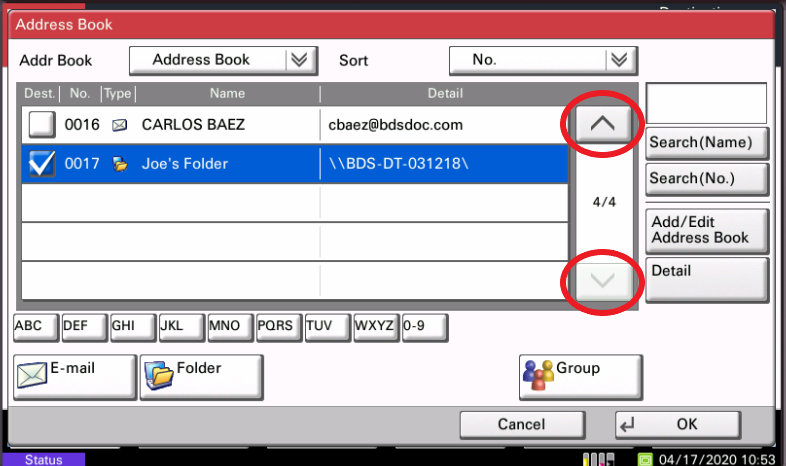
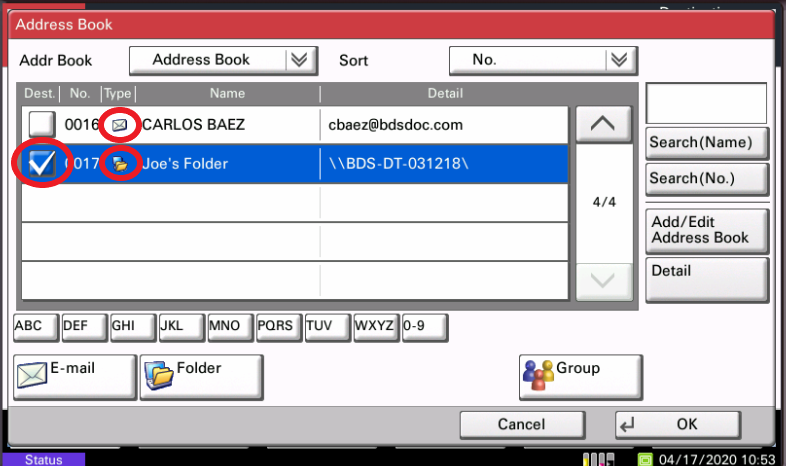
3. Choose your scan destination #
(You can tell the difference between a folder and an email address by the icon presented. Find your destination and select it. Press the ‘OK’ button.)
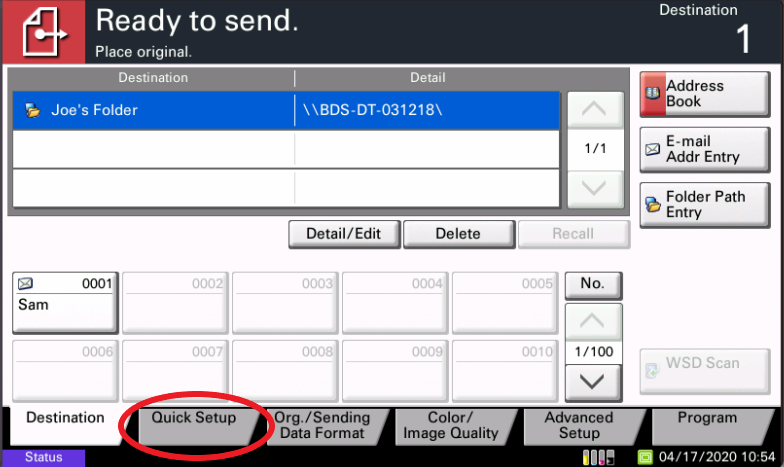
4. Press the ‘Quick Setup’ tab #
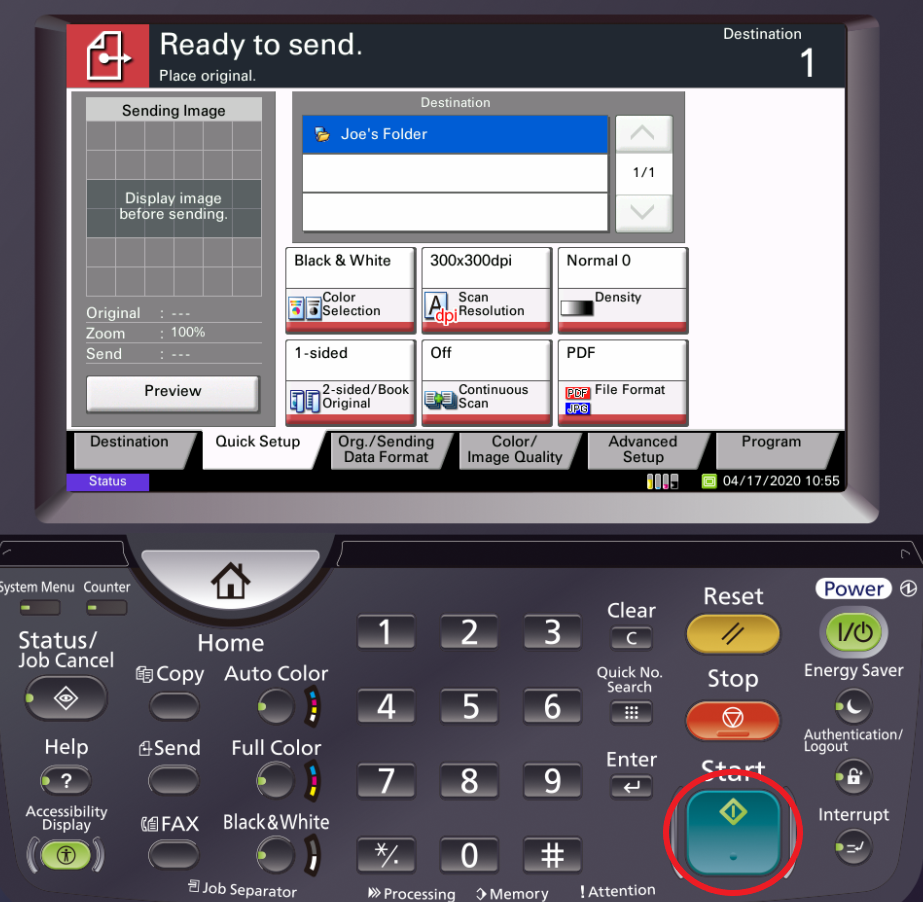
5. Review scan settings, then press ‘Start’ #
(It may be a touch screen button or a hard button depending on your model.)
You’re done!


