Here is a great video from Sam on where to download the correct driver, and how to install your printer/MFP in two different ways. Learn how to add a printer to the computer in this article.
How to add a printer to windows 10 – Watch the step-by-step video to add a printer.
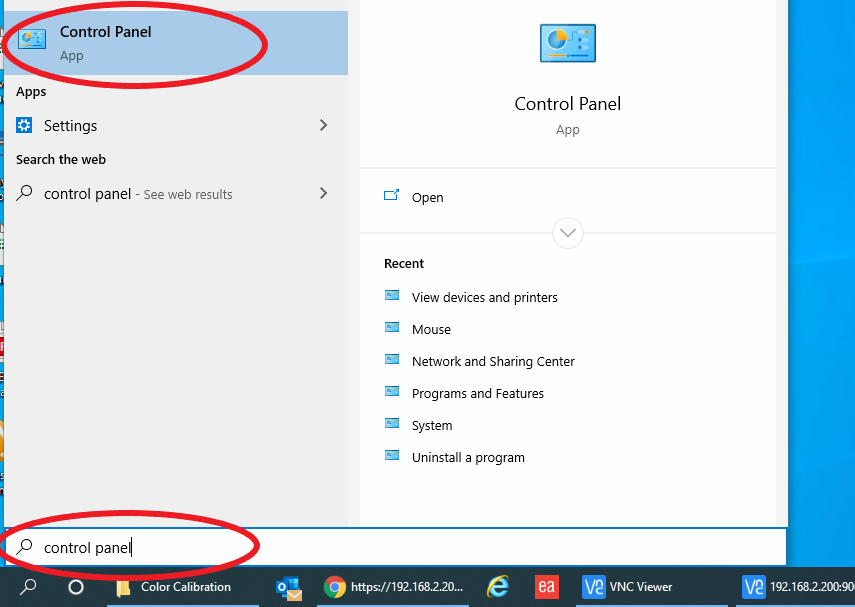
1. Open the ‘Control Panel’ #
Note: This article shows how to add a printer on windows 10
(To add a printer open the search bar or start menu of Windows 10 and type ‘Control Panel’ to bring it up)
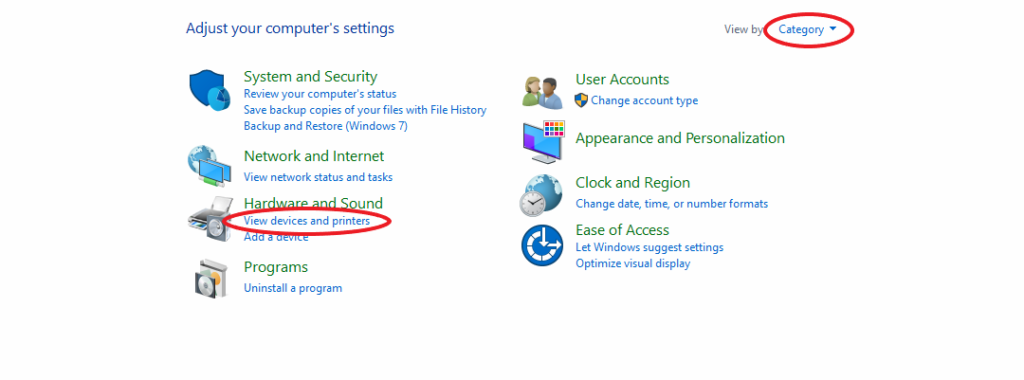
2. Press ‘View Devices and Printers’ #
(If you can’t find the device or printer, sort by category and your screen will look identical to mine)
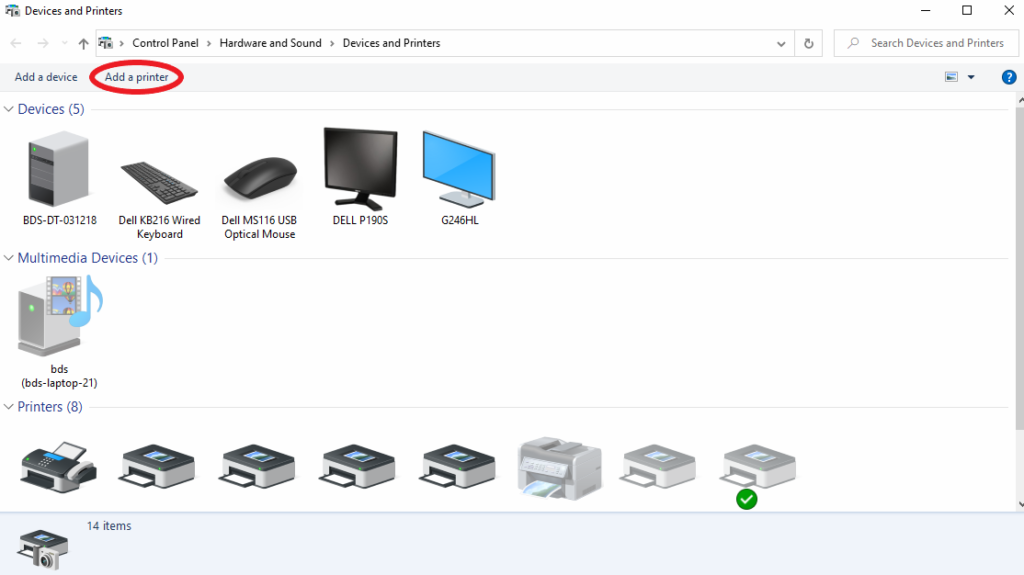
3. Press ‘Add a Printer’ #
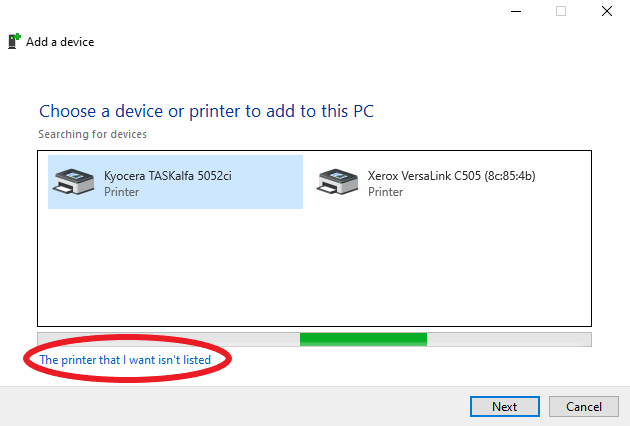
4. Click ‘The printer that I want isn’t listed’ #
(Even if you see your printer on this first screen it is best practice to add your device as a TCP/IP device and clicking on the printer here will add it as a WSD device)
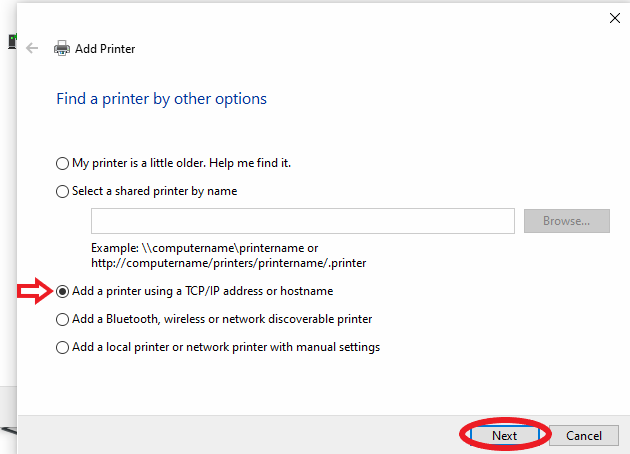
5. Choose ‘Add a printer using TCP/IP address or hostname’ #
(Press next)
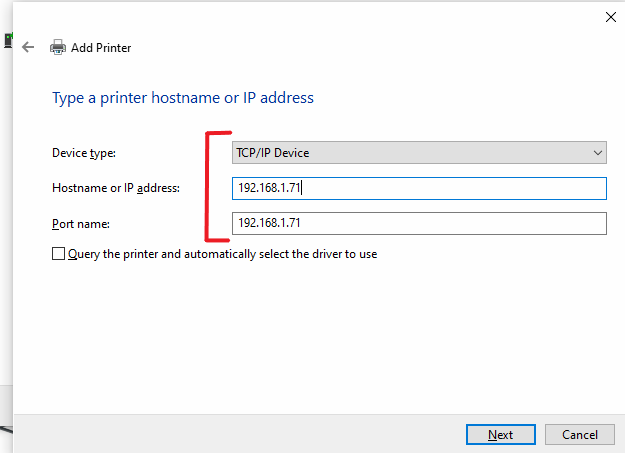
6. Choose ‘TCP/IP Device’, fill out the IP address, and press ‘Next’ #
(It is most common to use the IP address for the port name but it can be anything. If you do not know your printers IP address, see our guide on how to find it here: How to find your IP address)
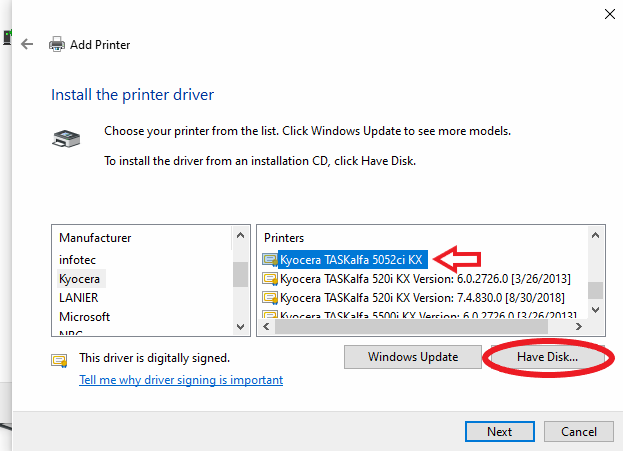
7. Select your model and press ‘Next’, or press ‘Have disk’ #
(If you do not see your model followed by ‘KX’ then you will need to download the driver and select it by pressing ‘Have disk’. Sam shows us how to download the correct driver in the video above starting at 1:42. If you found your model followed by ‘KX’ like in the example, skip to step 9)
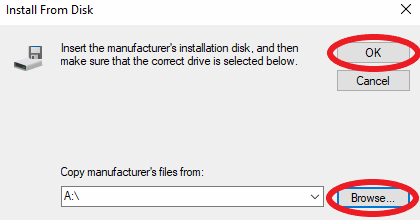
8. Click ‘Browse’ then ‘OK’ #
(Browse to where you downloaded the driver and select the driver file. If you get lost, please watch the video above and Sam will guide you)
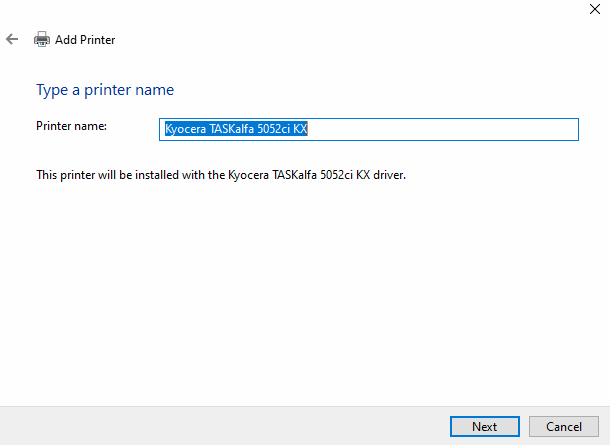
9. Name your printer or press ‘Next’ #
(Pressing next will simply name the printer the same model of print driver that was selected)
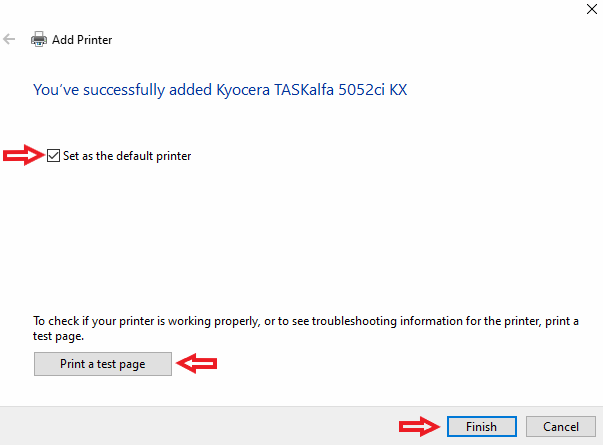
10. Choose to default, print a test page, and press ‘Finish’ #
(Here you can choose to make the printer the default printer and to print a test page or not. Press ‘Finish’ once you are ready)
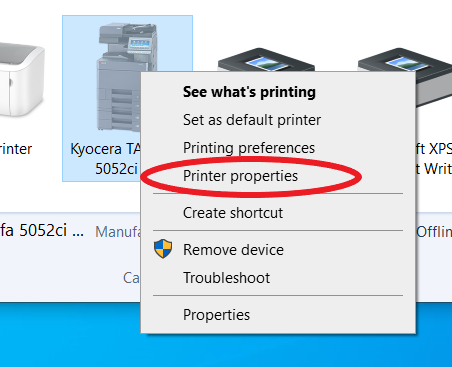
11. Right-click on your new printer and select ‘Printer Properties’ #
(We are now going to change a couple default values in the print driver)
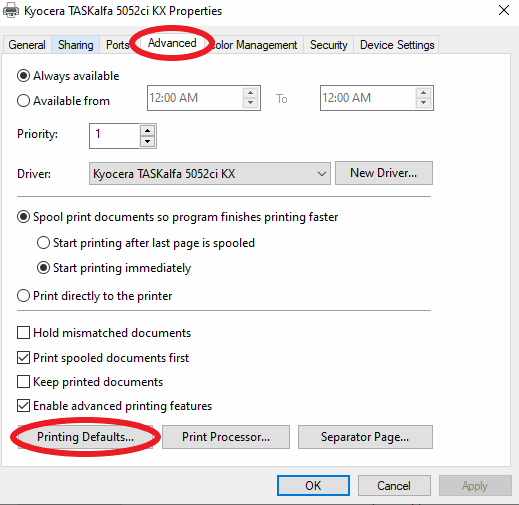
12. Click the ‘Advanced’ tab. Press ‘Printing Defaults’ #
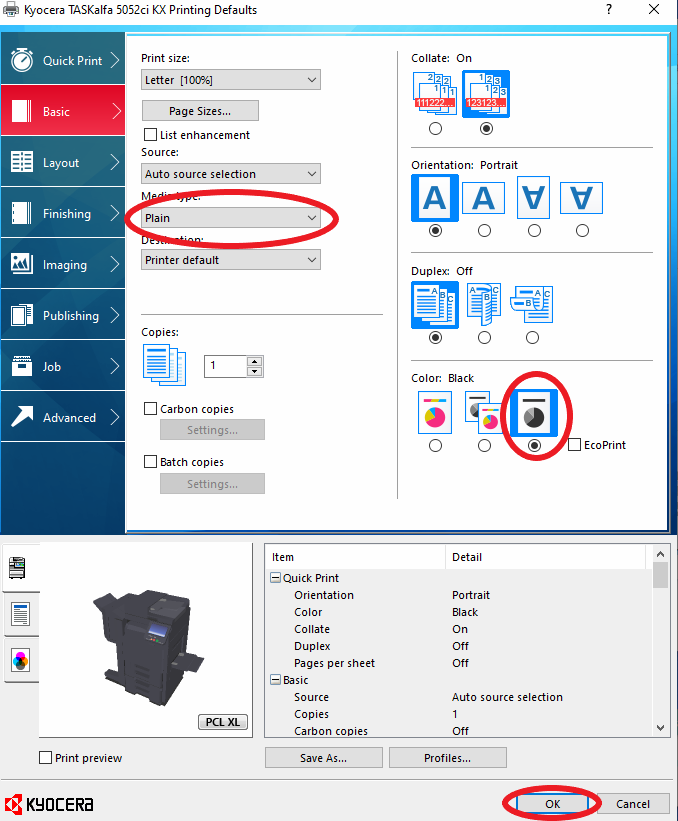
13. Choose ‘B&W’, and ‘Plain’ for ‘Media Type’. Press ‘OK’ #
You’re finished! Your MFP printer should now be added to your computer!


