The article describes how to edit or turn on your Kyocera MFP’s energy and low power timers. The energy and low power timers on your Kyocera MFP will let you set restrictions on your TASKalfa or ECOSYS machine based on your average power consumption. The sleep timer can be set to a lower setting when printing low volumes, allowing your office to save energy. During high-volume parts of your season, you can lengthen the timer of your MFP Copier.
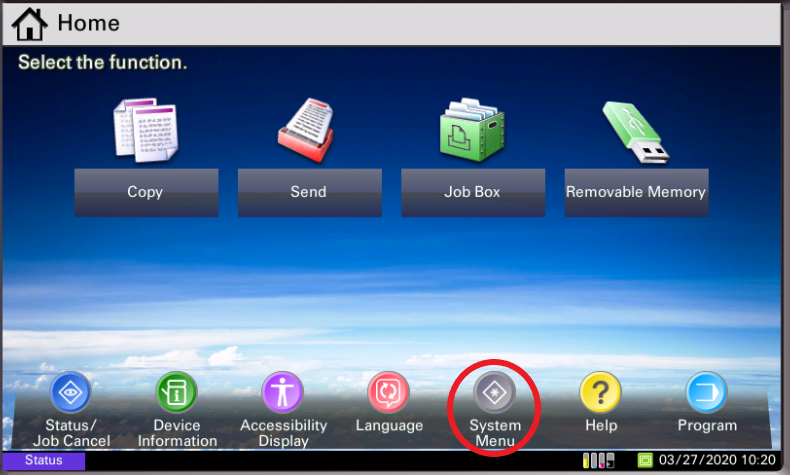
1. Press the ‘System Menu’ button #
To get started, from the Kyocera Printer’s interface, click the system menu button.
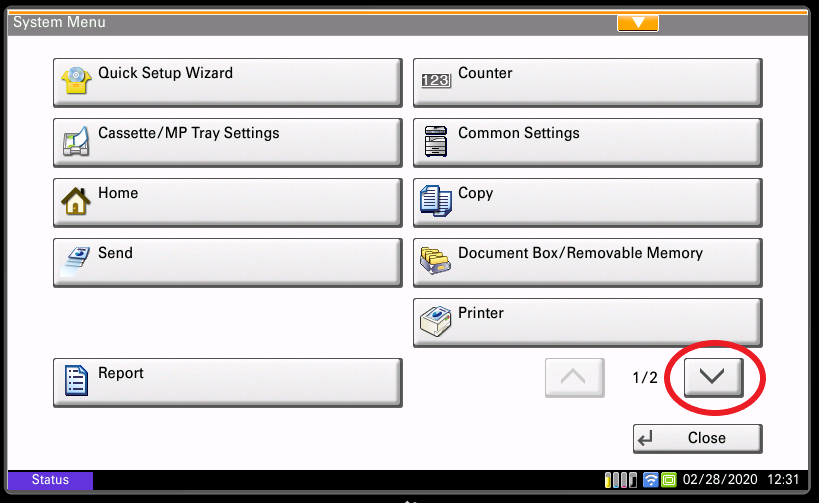
2. Press the ‘Down Arrow’ button #
Using the Kyocera Machine’s interface, go to page two of the system menu, date, timer, and click energy saver.
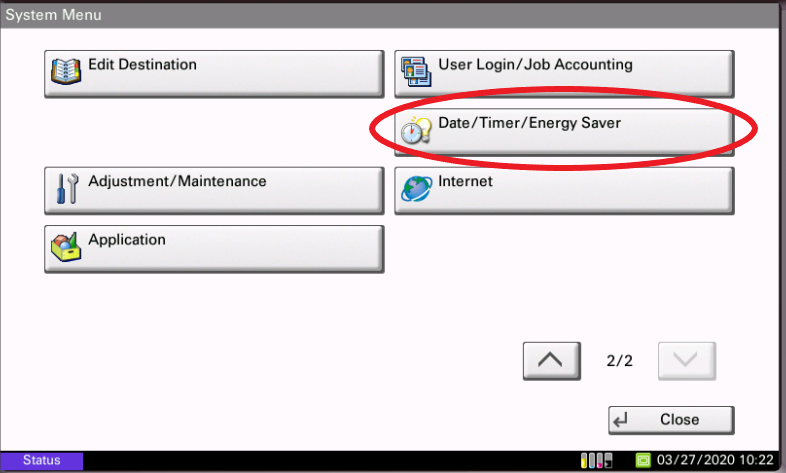
3. Press the ‘Date/Timer/Energy Saver’ button #
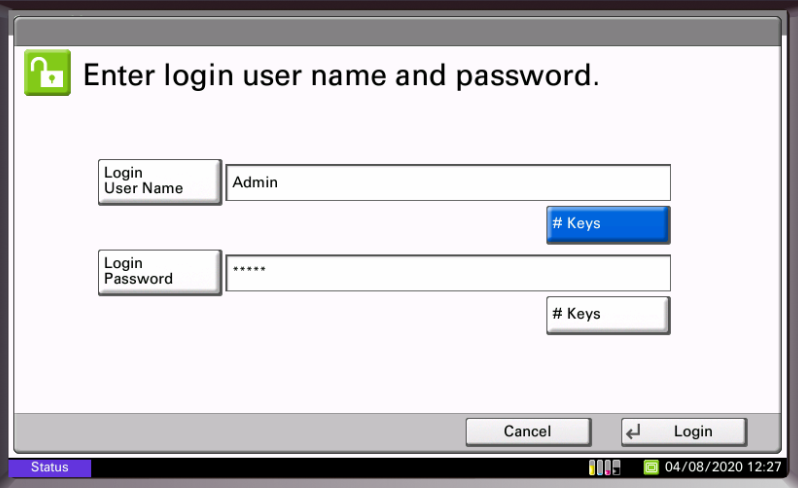
4. Login with credentials #
The user will be prompted to enter their username and password to log into the Kyocera Machine.
(The picture below is just an example. For administrator credentials, please reach out to your IT administrator or your Kyocera Service Provider)
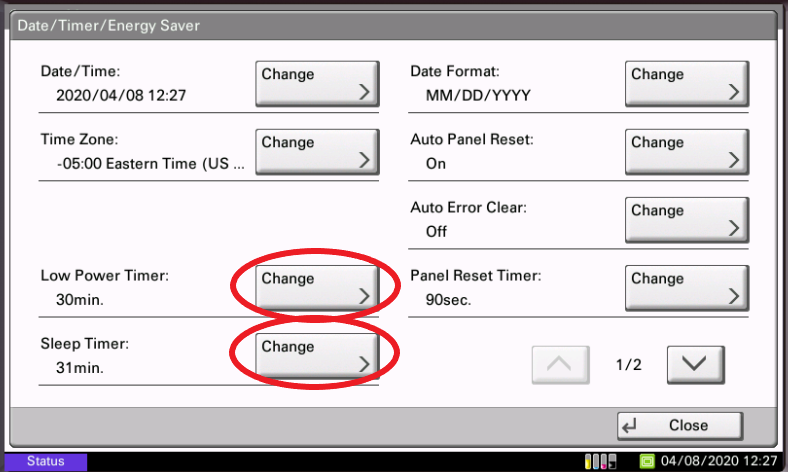
5. Change energy saver timers #
(From here you can change the low power and sleep timer by pressing on the respective button)
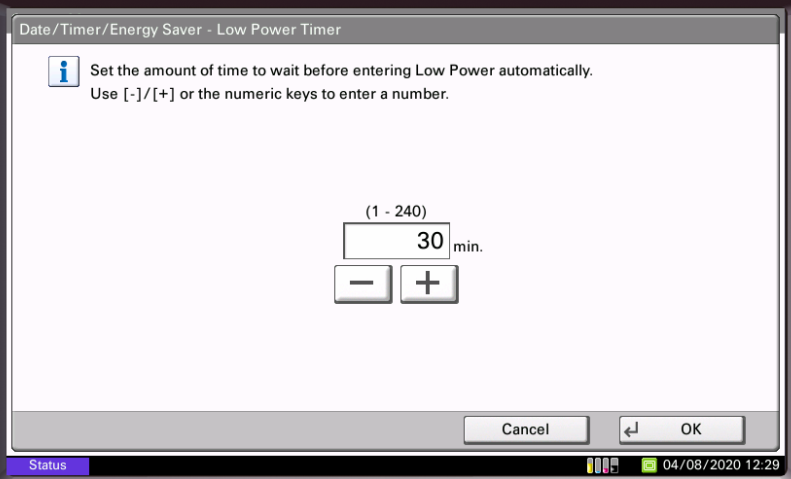
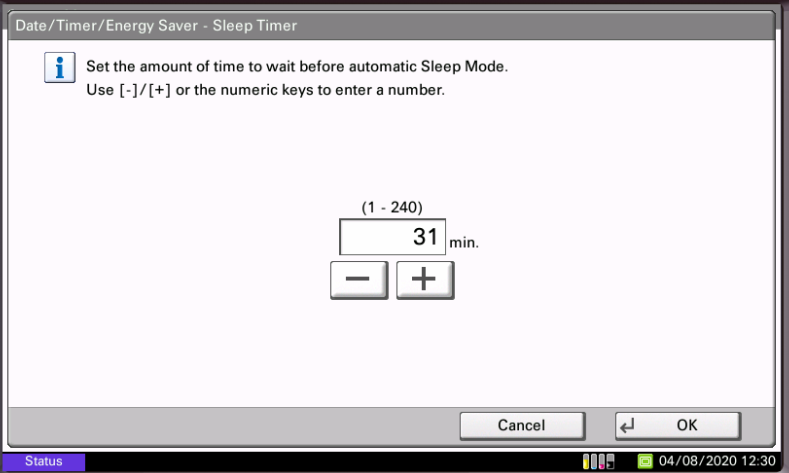
You will see two options once you have logged in as an administrator. The first option will be the sleep timer, and the second will be the low power option. It is possible to set the sleep timer and the low power timer to a maximum of 120 minutes.
Using the sleep timer, the Kyocera machine is put into a deeper energy conservation mode; as a result, it takes 30-40 minutes for the Kyocera Machine to become ready for use. When the low power timer is used, the fuser stays in high energy mode, allowing for rapid recovery and faster printing times since the fuser stays active rather than going to sleep.
You’re done! You can manage your Kyocera MFP’s low power and sleep timer in this video and article.


