We are going to walk through the Kyocera address book setup. Using the web interface on your MFP copier, you can edit or change the address book from your web browser, and they will be updated in the send function. Sam, our lead product trainer, shows how to edit the address book in the video below using our Kyocera TASKalfa machine.
In order to edit the Kyocera Address book, we need to know our Kyocera MFP IP Address.
1. Open a web browser and enter your machines IP address into the URL bar #
(If you do not know your machine’s IP address, see our guide here: How to find your Kyocera MFP IP address)

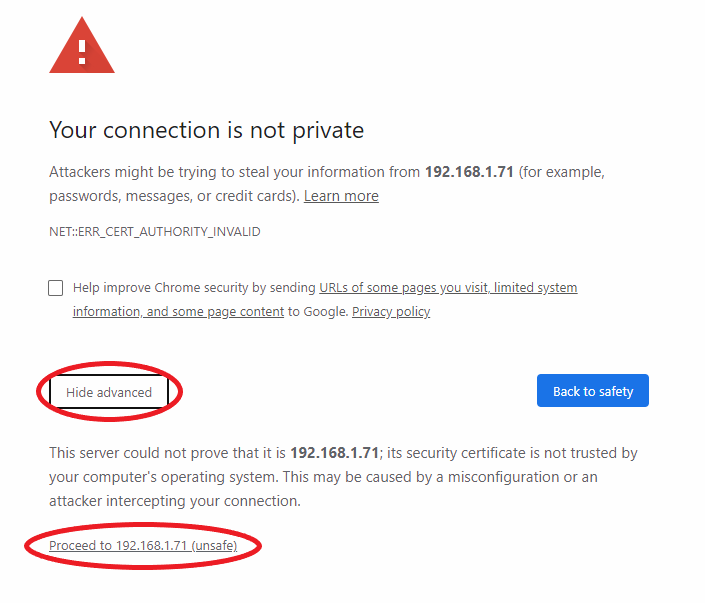
2. Press ‘Show Advanced’ and then click ‘Proceed to *your ip address*’ #
(This example is from Google Chrome. If using another web browser, your certificate error will look slightly different. Just make sure to proceed to the site.)

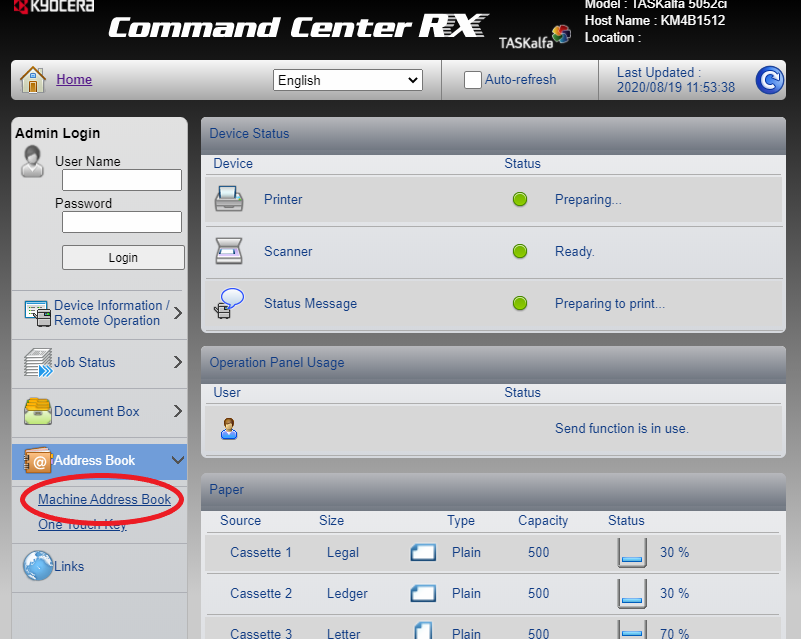
3. Highlight ‘Address Book’ and then click on ‘Machine Address Book’ #
When you are in the Kyocera Command Center RX, highlight the Kyocera Address Book of your device on the left side of the screen. This Kyocera Machine Control Panel should look familiar if you have a Kyocera TASKalfa xx1, xx2, or xx3 series.

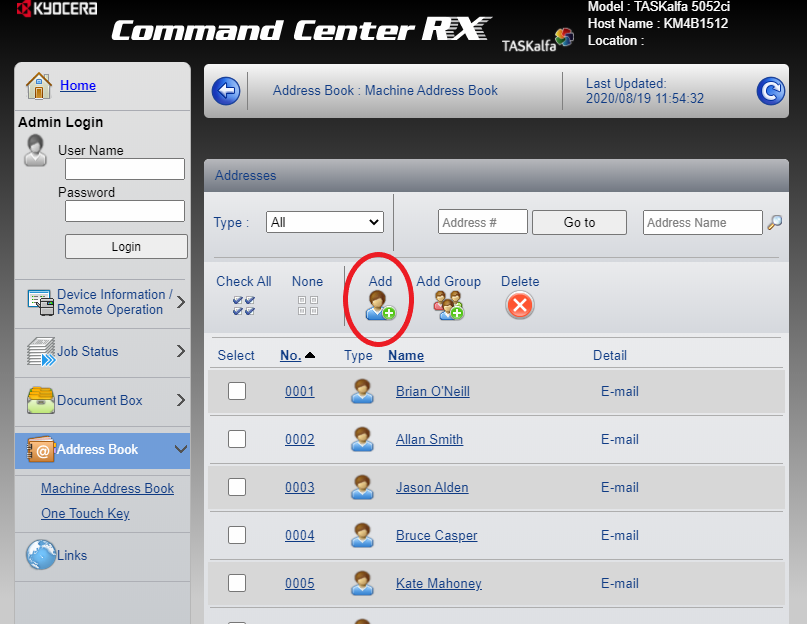
4. From here you can add or delete users. Click on ‘Add’ to add a user in the Kyocera Address Book #
Once in the Kyocera Address book, you have the ability to add or delete users when setting up your address book.

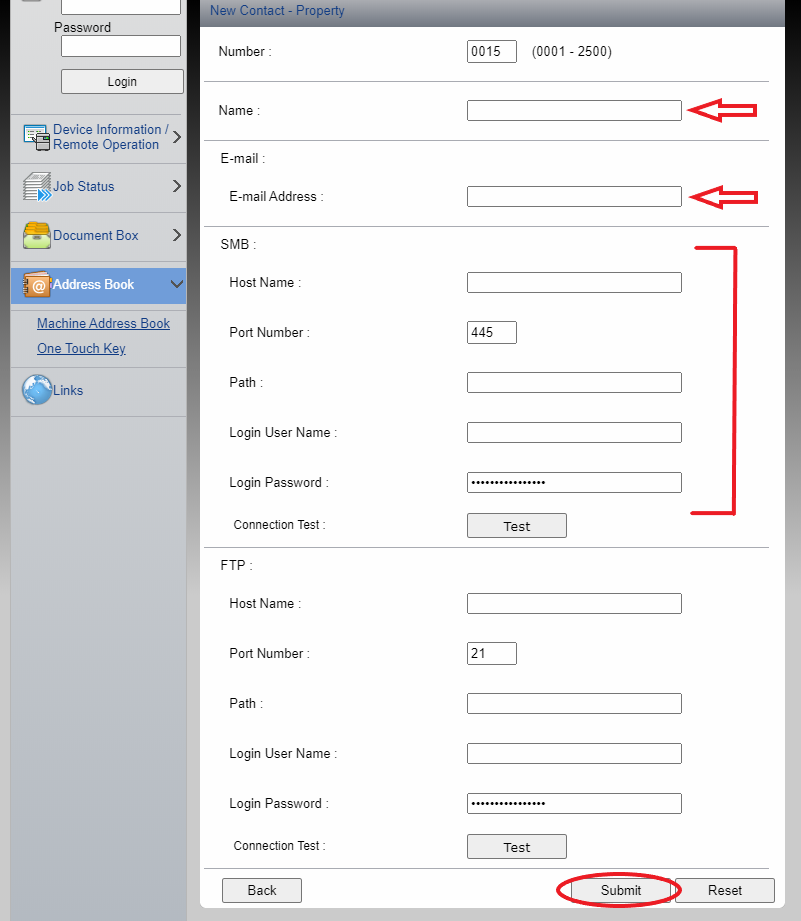
5. From here you can add the users name, email address, and a shared folder path. Once you have filled out the desired fields, press submit #
The email address is the one that will be used for Scan-to-Email (SMTP) and the folder path will be used for Scan-to-Folder (SMB). It is worth noting that the only field that is REQUIRED is the ‘Name’ field.

If we navigate back to our copier using VCN viewer, click send, and your Kyocera Address book will appear. We can see that our new address has been entered into the Kyocera Machine.
In today’s video and instruction, we learned how to edit the Kyocera MFP’s address book.


