Need the proper steps to set up scan to folder on a Kyocera TASKalfa series copier/MFP? In this article, we will walk through how to scan to the folder through the control panel on a Kyocera printer.
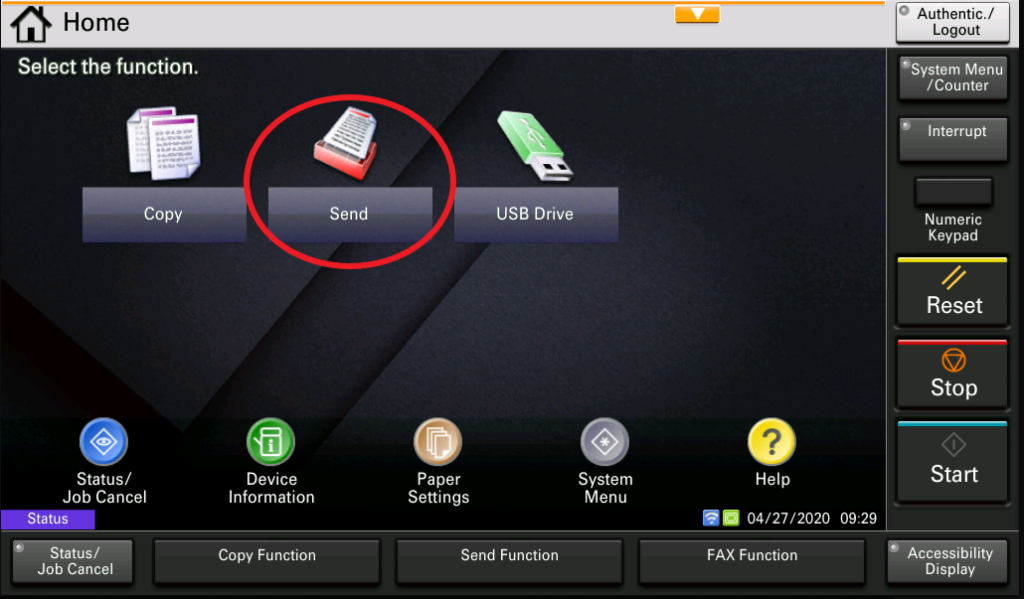
1. Press the ‘Send’ button on the Kyocera Printer Control Panel #
Once in the control panel of the Kyocera TASKalfa, press the send button.
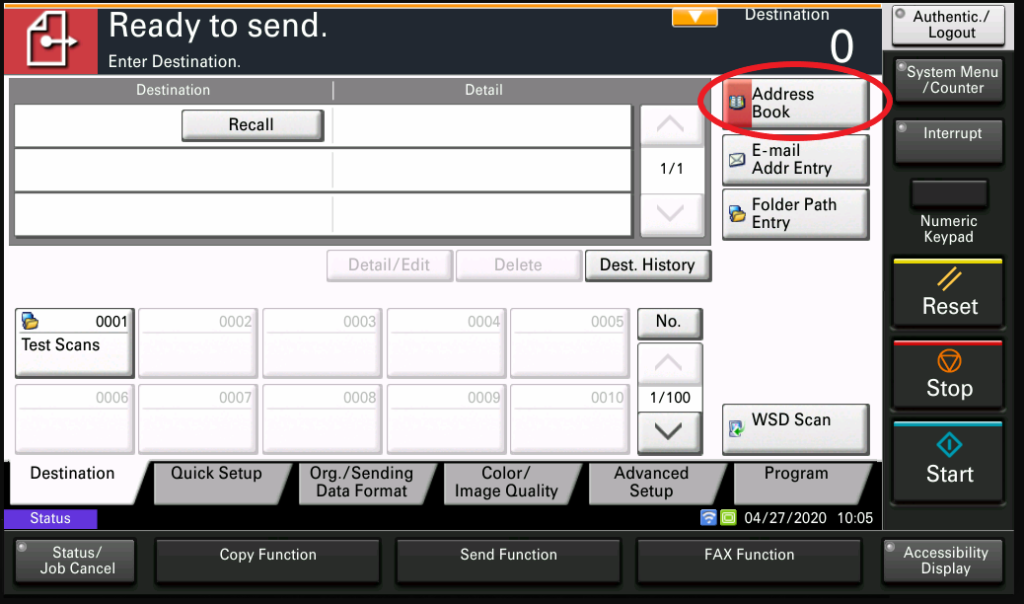
2. Press the ‘Address Book’ button #
(If your machine opens directly to the address book, skip this step. The default of opening to this screen or the address book when pressing the send button can be changed.)
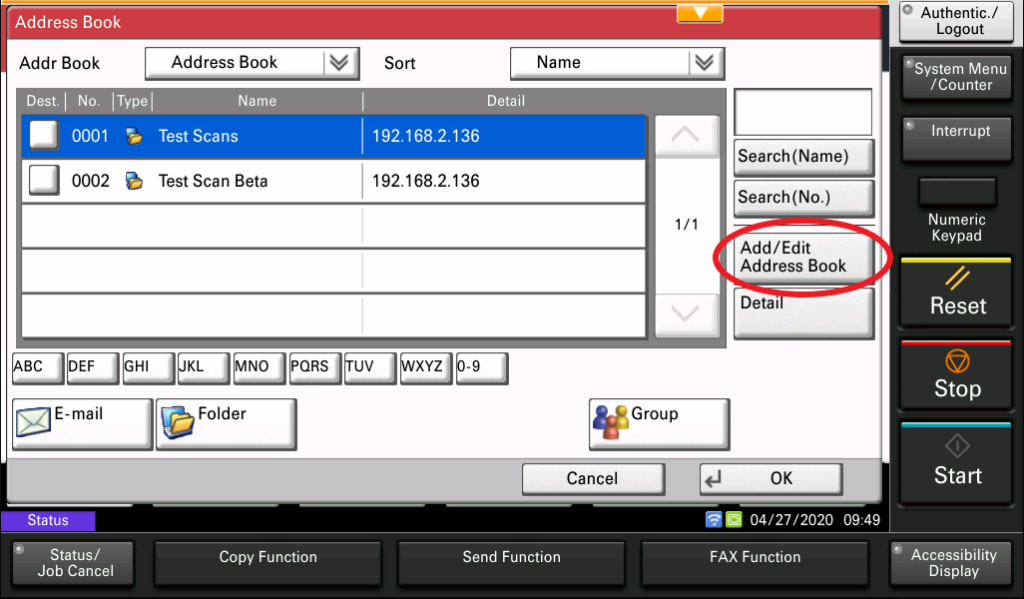
3. Press the ‘Add/Edit Address Book’ button #
Once in the Kyocera Address book settings, click on the Add/Edit address book. This will bring up the address book on your MFP.
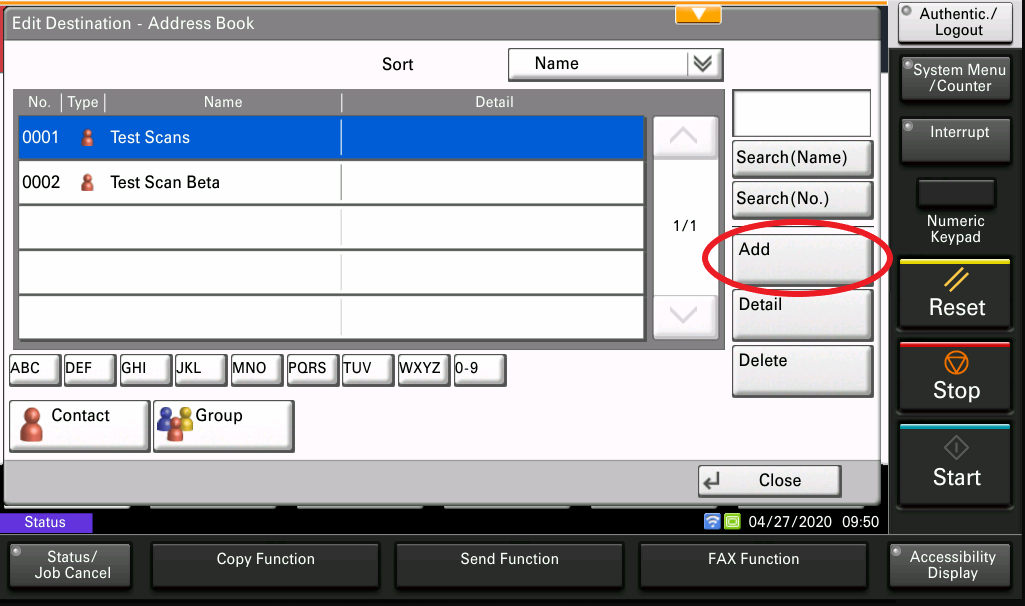
4. Press the ‘Add’ button #
Next we will click the add button to be able to scan to a new folder.
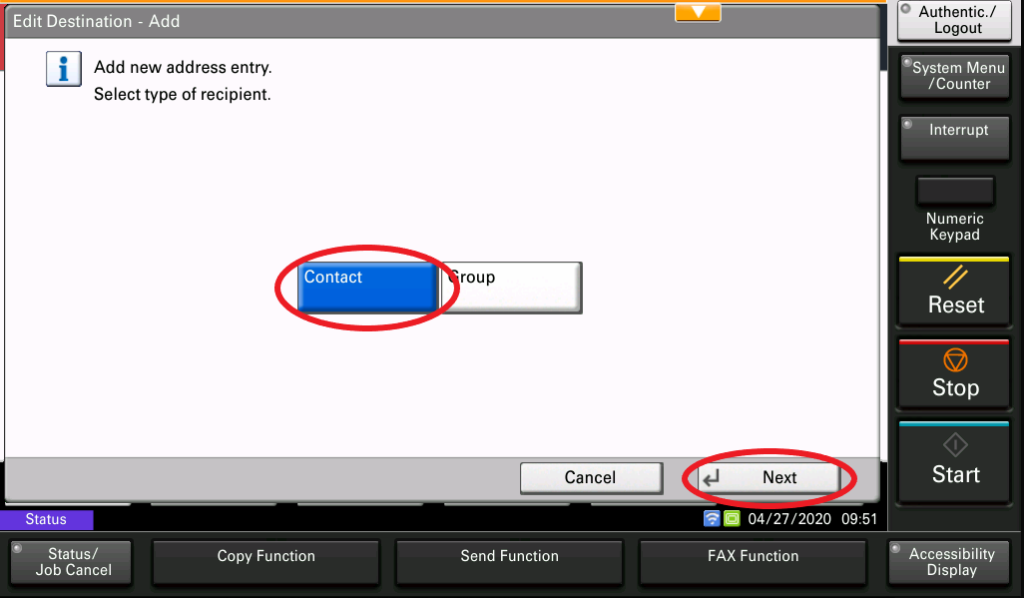
5. Select ‘Contact’ and press ‘Next’ #
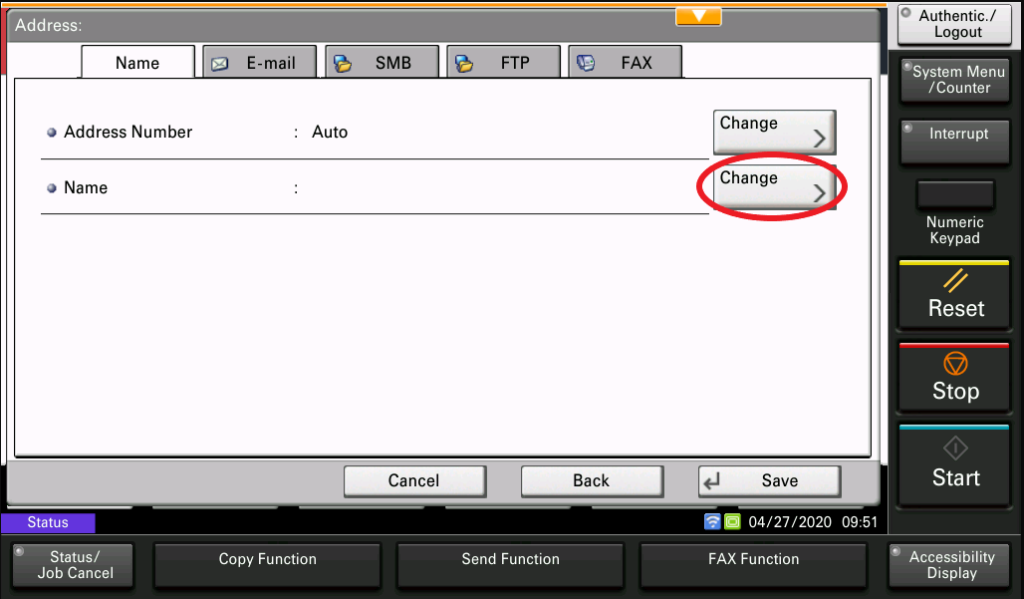
6. Enter the name #
(Enter the name to be displayed in the address book for this folder.)
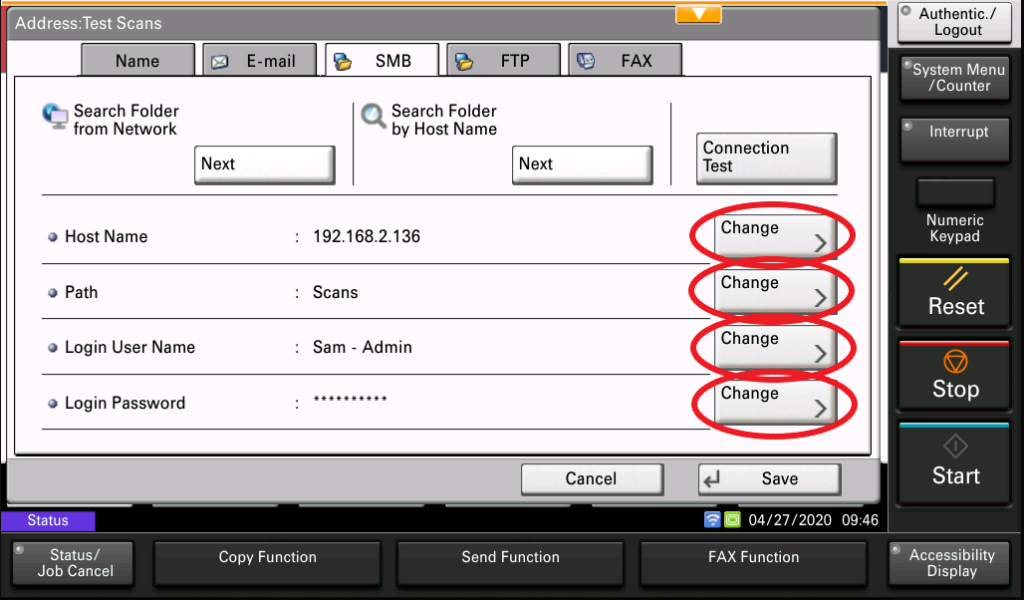
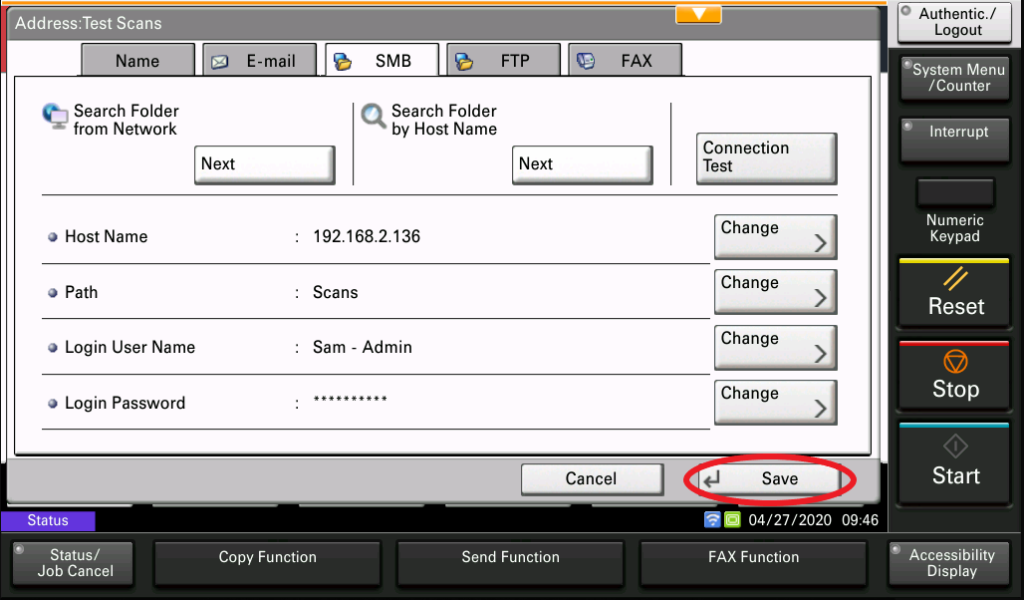
7. Fill out the Host Name, Path, Login Name, and Password #
(If you do not know this information, contact your IT administrator.)
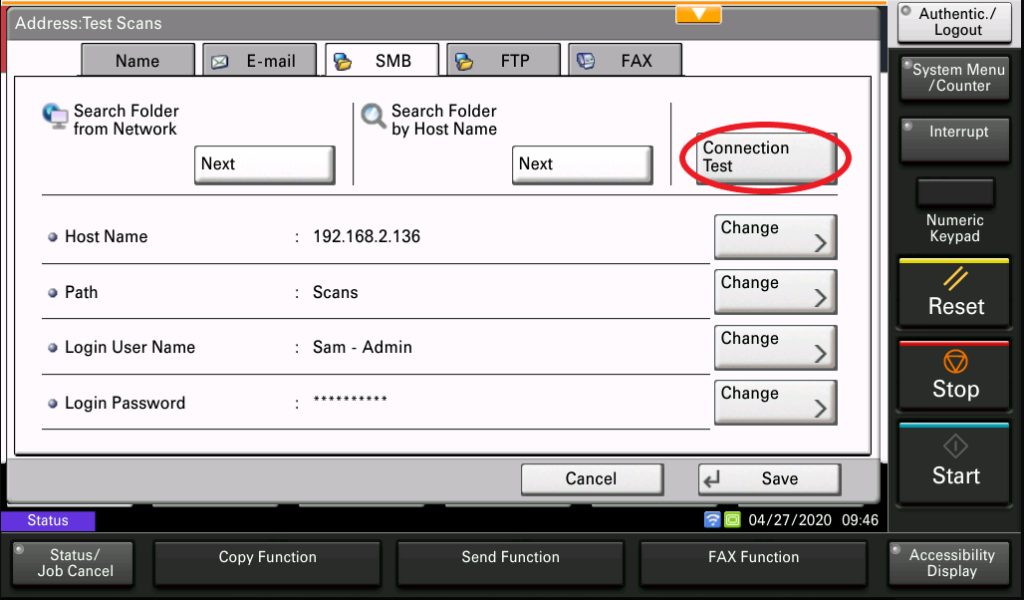
8. Press the ‘Connection Test’ button to make sure the fields were filled out properly #
9. Press the ‘Save’ button #
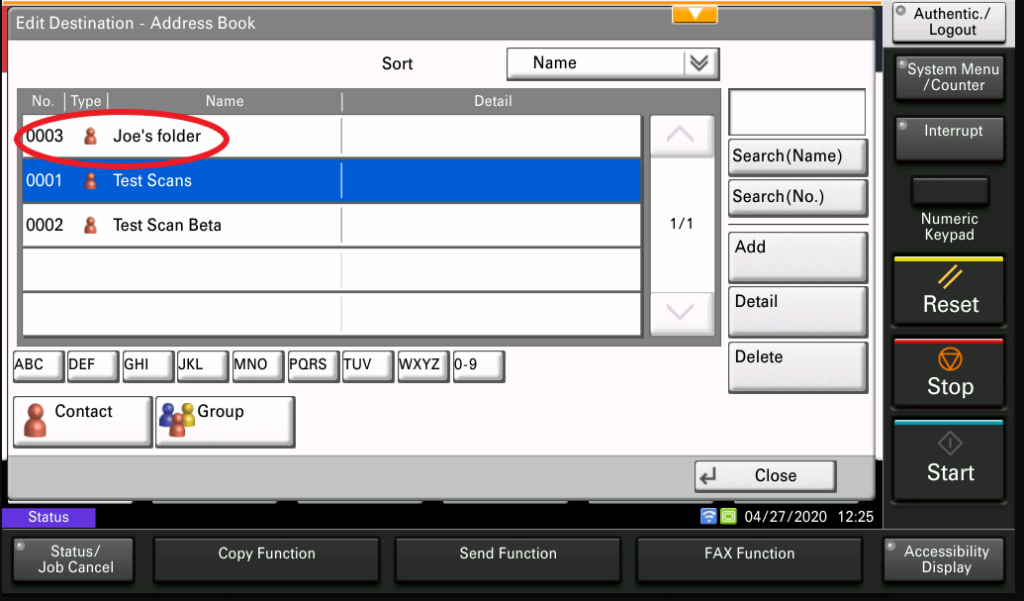
You can now see the newly added entry available. With Kyocera’s Scan to Folder Setup Tool for SMB you can easily send scanned images to a folder using the SMB protocol.
You can set up the destination in the address book and, optionally, as a One Touch Key on the MFP. As part of the setup process, the Setup tool registers the entry in the address book and identifies the PC associated with it.


