Kyocera TASKalfa xxx2/3 Series Continuous Scan Guide
This article walks through setting up continuous scan on your Kyocera TASKalfa multifunction device. The benefit of setting up the continuous scan feature on your device is if your document feeder that doesnt hold enough pages and your document is too big – you can separate and scan as normal.
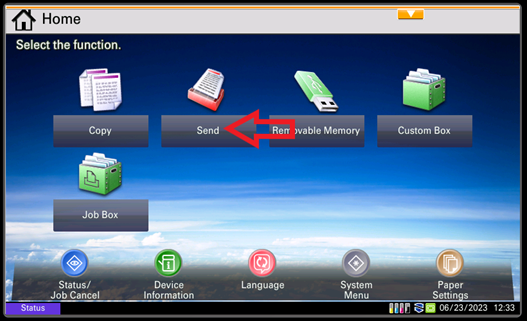
1. Locate the send button on the Kyocera TASKalfa interface. #
Navigate to the control panel interface and choose the send button.
2. Choose a user destination from the address book/ one touch keys or enter one manually. #
Once in the send function you can navigate to your address book or one touch key. If the user destination is not set up, you can enter one manually.
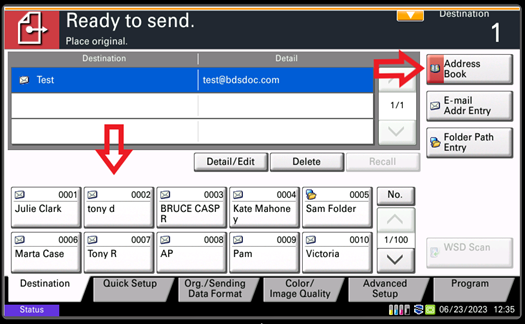
*Note: Make sure you are in the Scan destination tab at the bottom of the screen. On Kyocera Devices 3 series and above this feature is listed on the right hand side.
3. Click the ‘Continuous Scan’ button. #
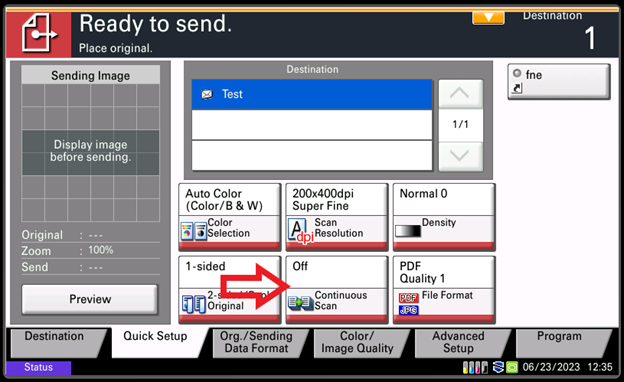
4.Press the ‘On’ button to turn on the continuous scan. #
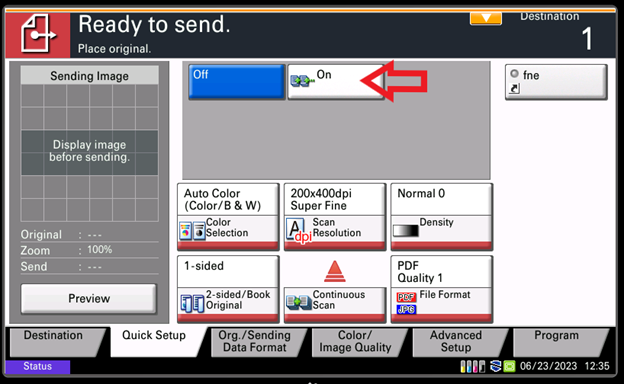
5. Place your originals and press [Start]. Your job will start processing. #
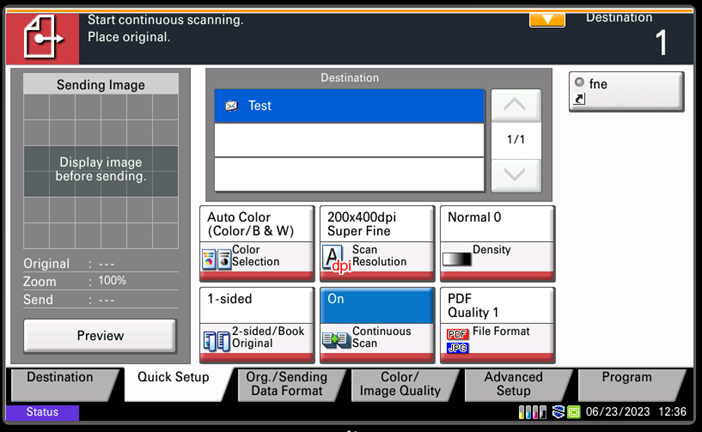
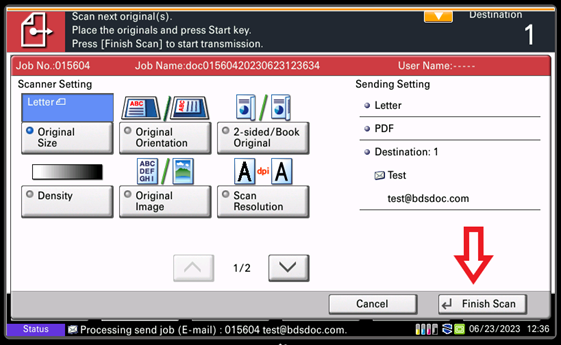
6. Finish Scan #
Make any function settings changes necessary, place the new originals to be scanned, and press [Start] again. Alternatively, press ‘Finish Scan’ to send the scanned documents to their destination.
