Kyocera TASKalfa Machine fax forwarding rules can be set up in two different ways. Using the web interface is one way of setting up your fax forwarding rules while using the touch screen interface on your multifunction copier is another.
With Kyocera Copier Machines, you can set up rules for the copy to be sent to an email address or a specific folder in your office, thus decreasing the need for physical paper faxes in the office as a result.
1. Type your machine’s IP address into the URL bar of a web-browser #
You will need your IP address to access the Kyocera MFP Interface. Once you have the IP Address, type it into your Machine’s interface and login in.
(If you do not know your machine’s IP address, see our guide here: How to find your IP address)

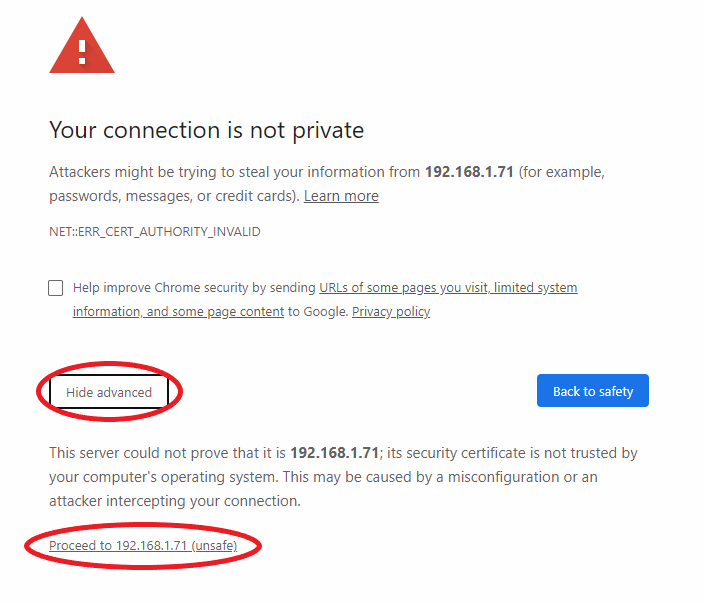
2. You will receive a certificate error. Press ‘Show Advanced’ and then ‘*Proceed to *Your IP address*’ #
(This example is from Google Chrome. If using another web browser, your certificate error will look slightly different. Just make sure to proceed to the site.)
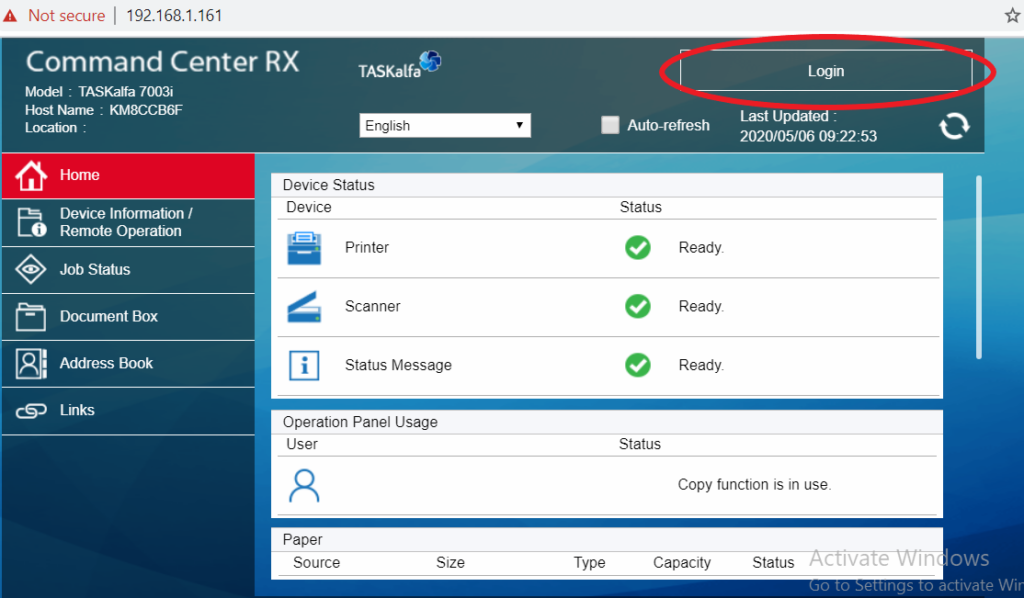
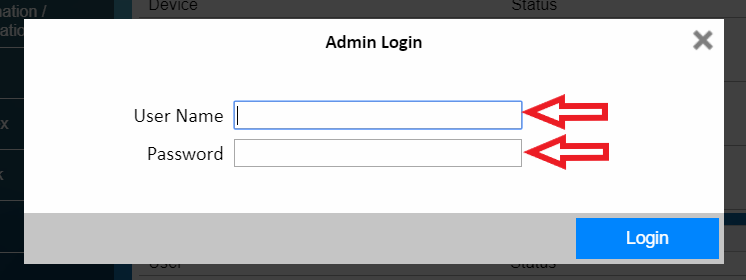
3. Login with your credentials #
(The picture below is just an example. For administrator credentials, please reach out to your IT administrator or your Kyocera Service Provider)
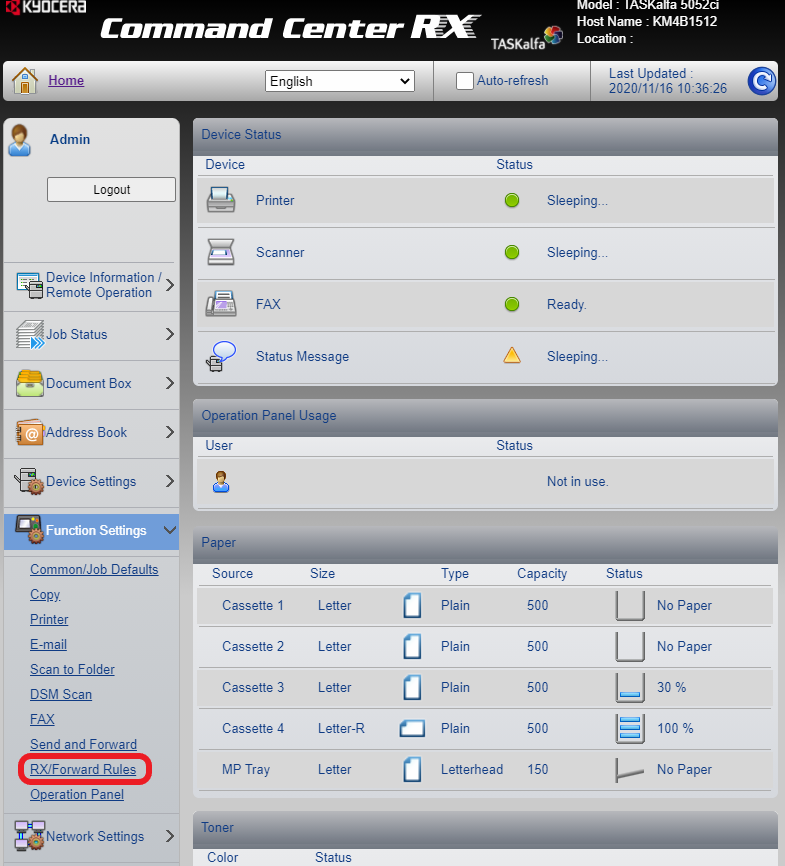
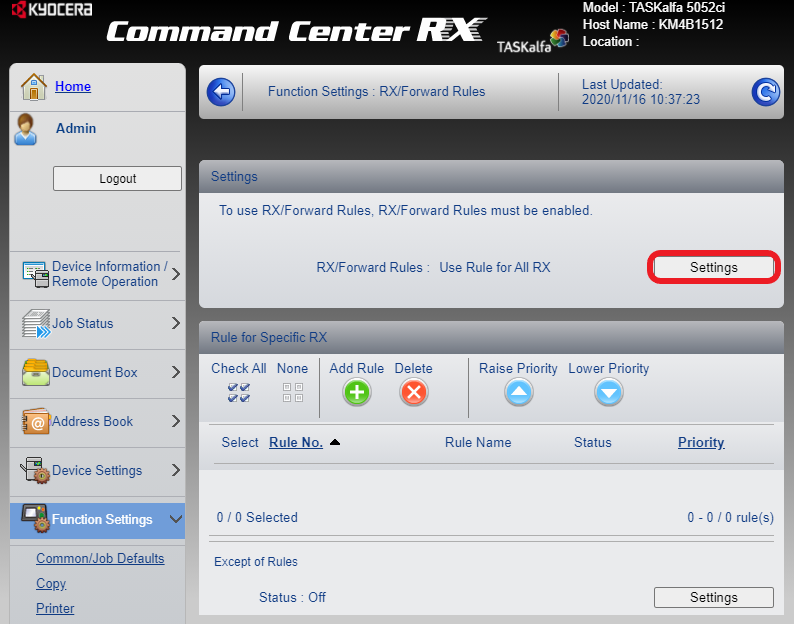
4. Highlight ‘Function Settings’ and click on ‘RX/Forward Rules’ #
Reception is referred to as RX. We will be setting up the Kyocera Fax forwarding rules through this when we receive a fax.
5. Click ‘Settings’ next to ‘RX/Forward Rules’ #
These settings will let you dive into more specific fax forwarding rules for your Kyocera.
6. Choose when to apply the RX rule in your Fax Forwarding Settings #
When clicking settings up top, we can set up specific fax forwarding rules, including certain fax numbers, different fax destinations, or all faxes to the same destination can be established.
In these settings, we can choose the destination of the fax. The destination when the machine receives a fax; it will forward the fax on. The Fax destination can be an email, folder, or another fax number.
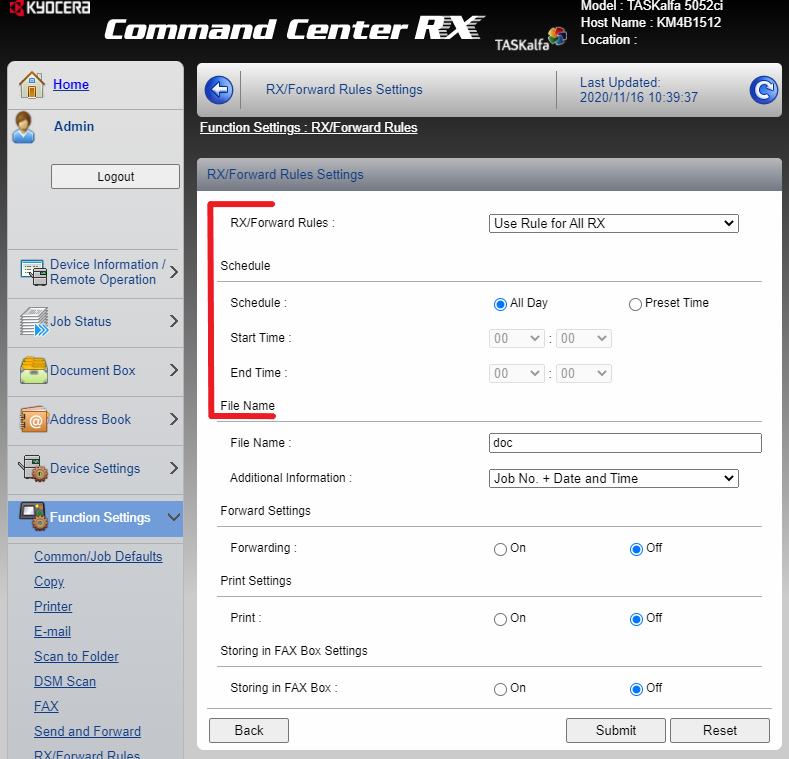
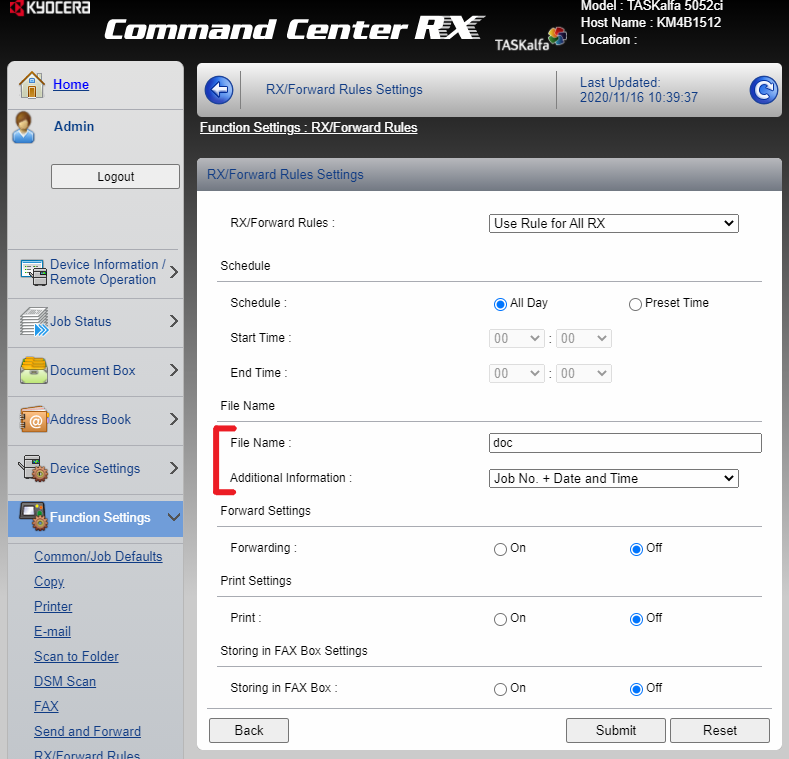
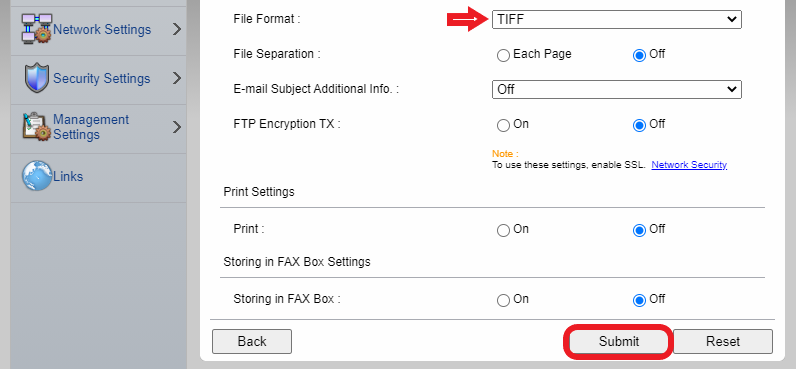
7. Choose the default file name format #

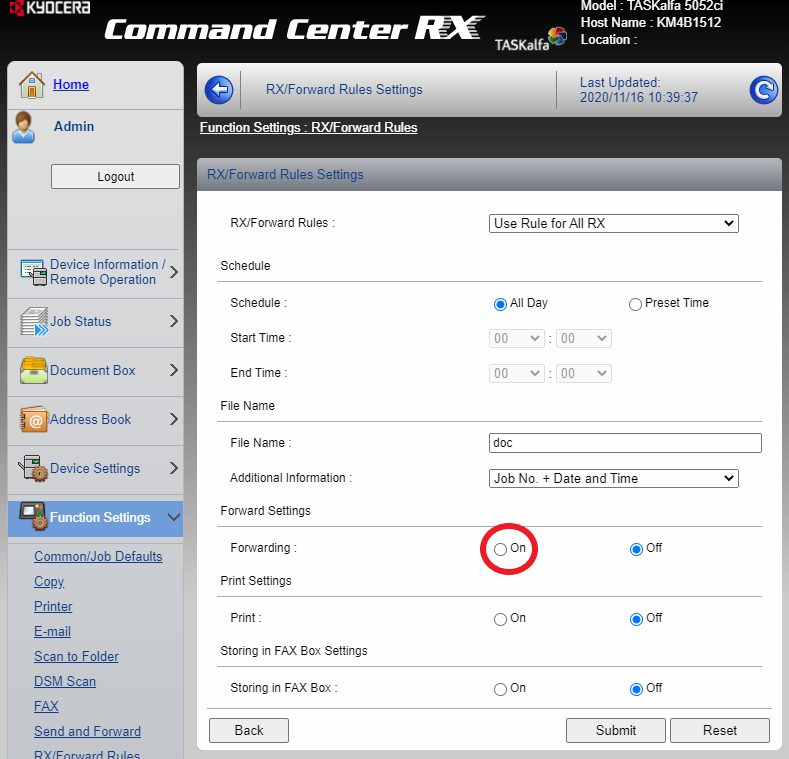
8. Click ‘On’ next to ‘Forwarding’ #
9. Choose the forwarding destination #
(Choose ‘Address Book’ if you would like you forward your faxes to a destination that is already in the address book (email address, network shared folder, or fax entry are all acceptable destinations). Choose ‘Email’ if you would like to forward faxes to an email address that is not in the address book. Choose ‘Folder’ if you would like to forward faxes to a network shared folder that is not in the address book. Choose ‘Fax’ if you would like to forward faxes to another fax number not in the address book.)
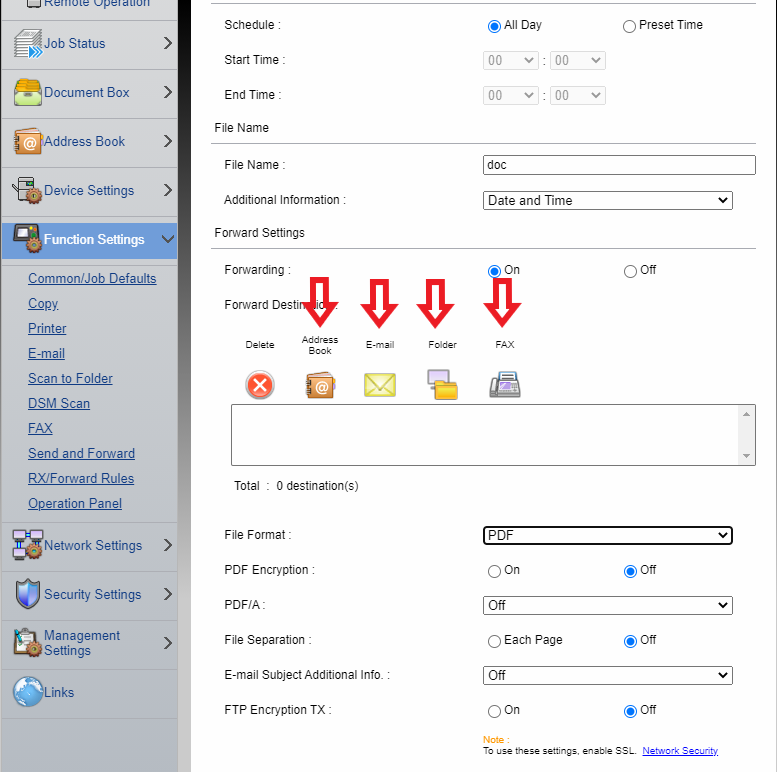
Additionally, we can set up our print settings to conserve paper. We can have the fax only forwarded, but never printed.
Below are examples of the available options
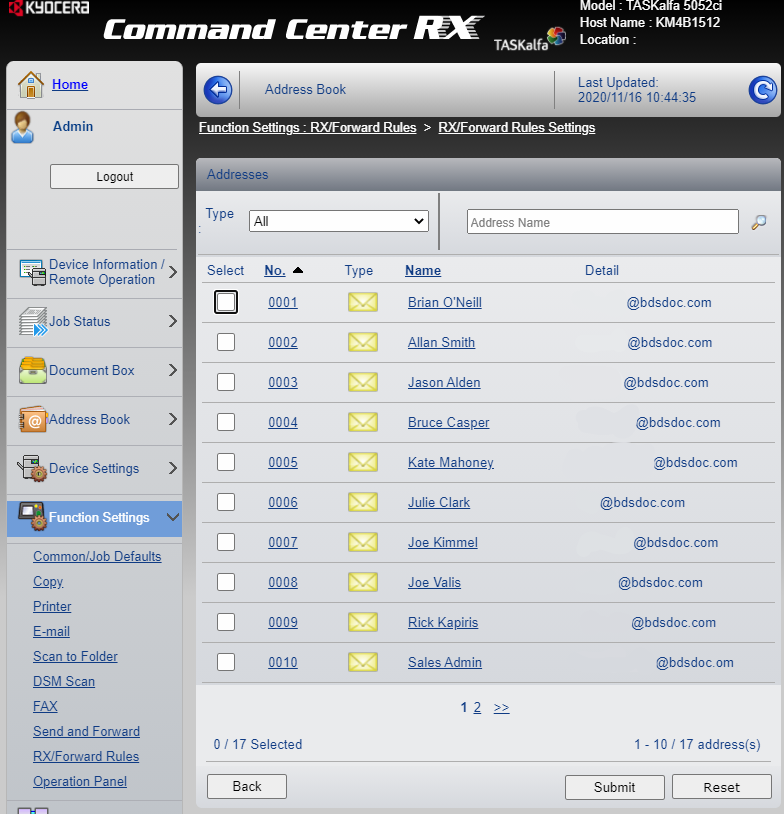
Address Book Destinations
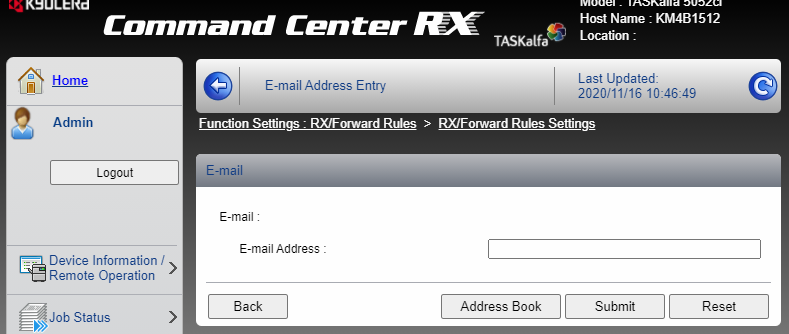
Email destination entry
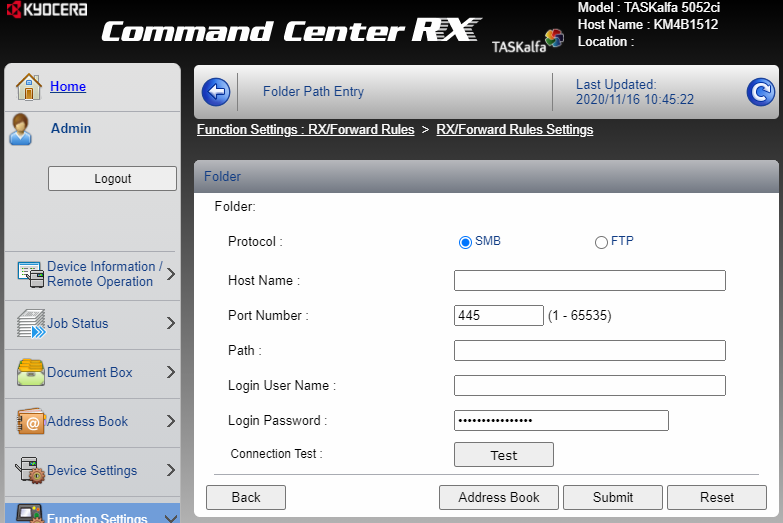
Network shared folder entry
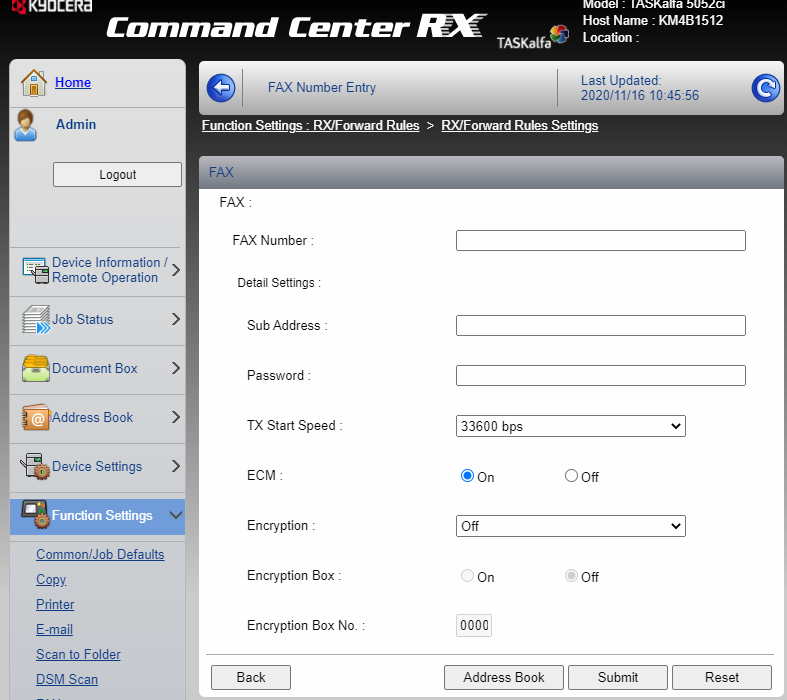
Fax destination entry
10. Choose ‘File Format’ and press ‘Submit’ #
You’re done!


