In this article, our lead trainer Sam demonstrates how to turn on your Kyocera TASKalfa MFP for faxing and scanning to send a result report. A printout of the result report will let you verify that the scan or fax was received by the intended recipient. This article will go through the steps to turn on the Fax and scanning results printout.
Here is a brief video from Sam on how to enable Send Result Reports.
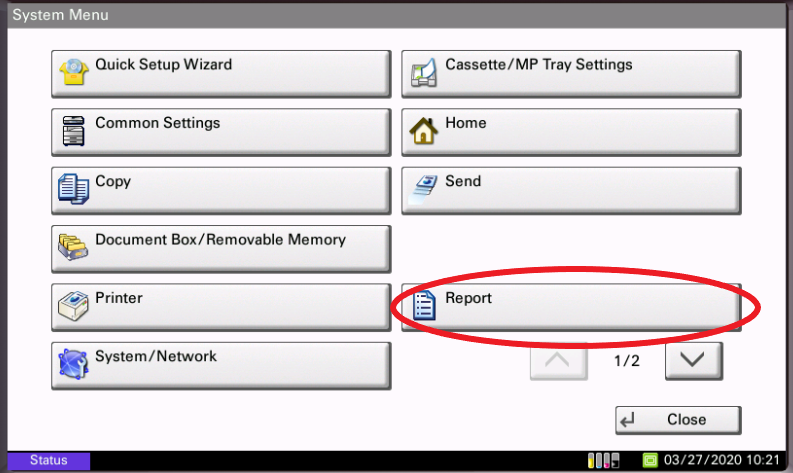
1. Press the ‘System Menu’ button #
The Kyocera TASKalfa Series comes with the Send Result report feature. To get started, from the Kyocera Printer’s interface, click the system menu button.

2. Press the ‘Report’ button #
In the System Menu, navigate to the report button.
3. Press the ‘Result Report Settings’ button #
We are looking for the result report system button in the report settings. To have a report generated when there is a specified result, we want it to be automatically generated. In this case, a send result report.
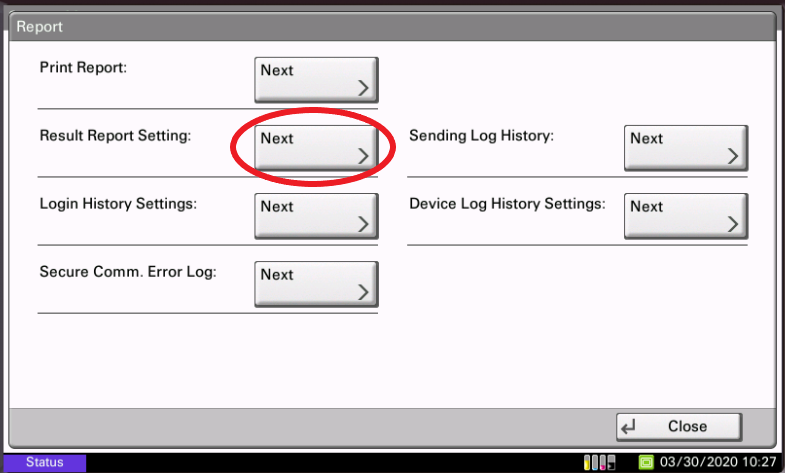
4. Press the ‘Send Result Report’ button #
The Send Result Report Button is what you want.

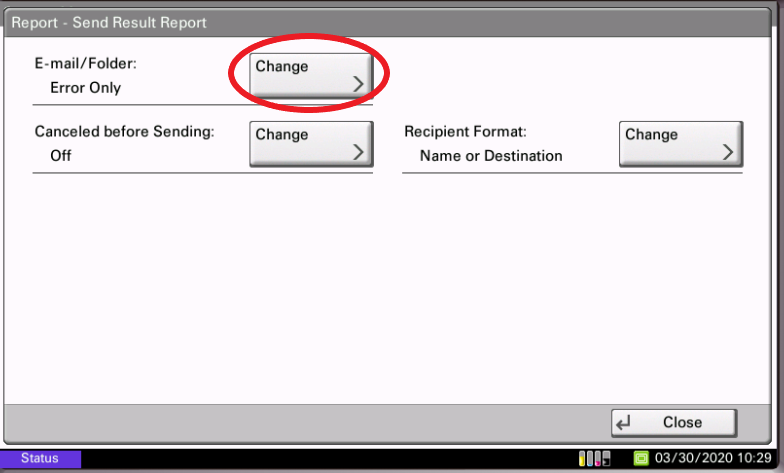
5. Press the ‘Email/Folder Change’ button #
If you had a fax option on your Kyocera Machine, this would be in the right column; the first option would be fax.
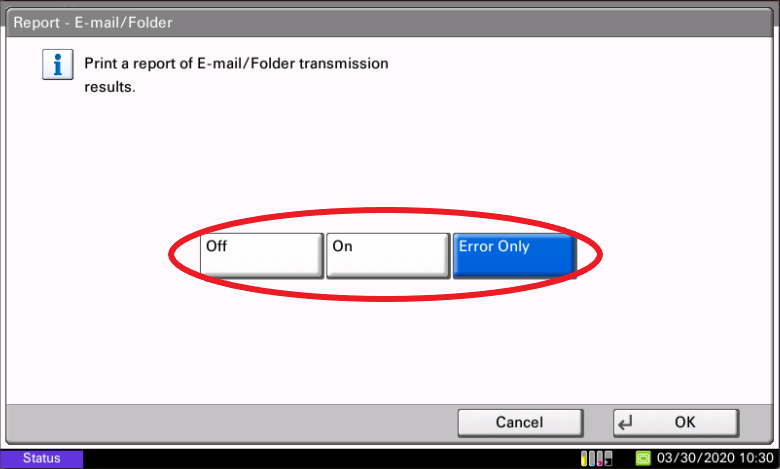
6. Press the desired setting (Off, On, Error Only) #
To turn on the error-only option for the email folder, click change. The report will only be sent if there is an error with the submission. In the second option, you will be able to print a confirmation of a scan result whenever a Kyocera machine sends a scan.
(In this example ‘Error Only’ is selected)
7. Press the ‘OK’ button #
After you have applied the settings, you can exit the Send Results Report by hitting close four times.
The video we watched today will show you how to set up Send Results reports for faxes and scans from your Kyocera TASKalfa machine for the emails and faxes you receive.


