Video: Changing the printer port information for a locally installed printer in Windows 10
One of the common printing faults we see in our service department is a printer suddenly showing as ‘offline’ after a network change. In a standard printer environment, a locally installed printer is configured with the IP Address of the physical printer to determine where the print job needs to ‘go’.
If the network changes (new router, new ISP, etc.), this can ‘break’ printing until we put the correct port information in the print driver on the local workstation.
In this article, we are going to show the steps to fix this issue.
- Before we can begin in earnest, we must get the new/current IP address of the physical printer/copier. If you are not sure how to find this, contact your IT admin, or see our video on Locating the IP address of your copier.
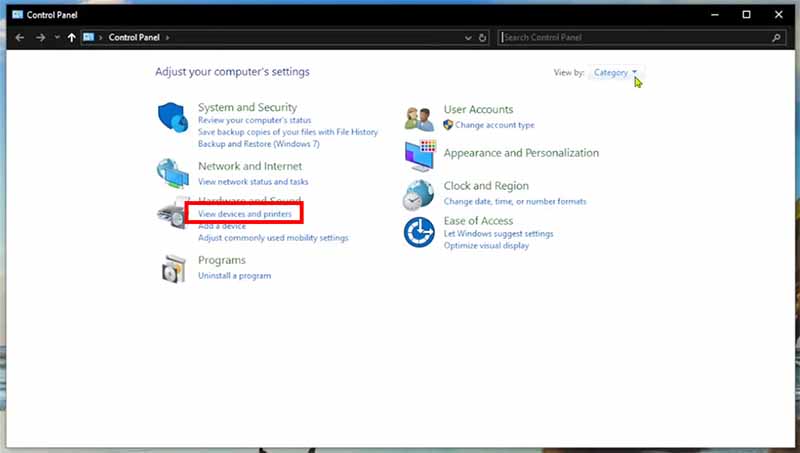
- Once you have that, we need to get to the Control Panel. Either hit the Windows button or select the “Type here to search”, type “Control Panel”, and hit enter.
- Once the Control panel is brought up, select “Devices and Printers”
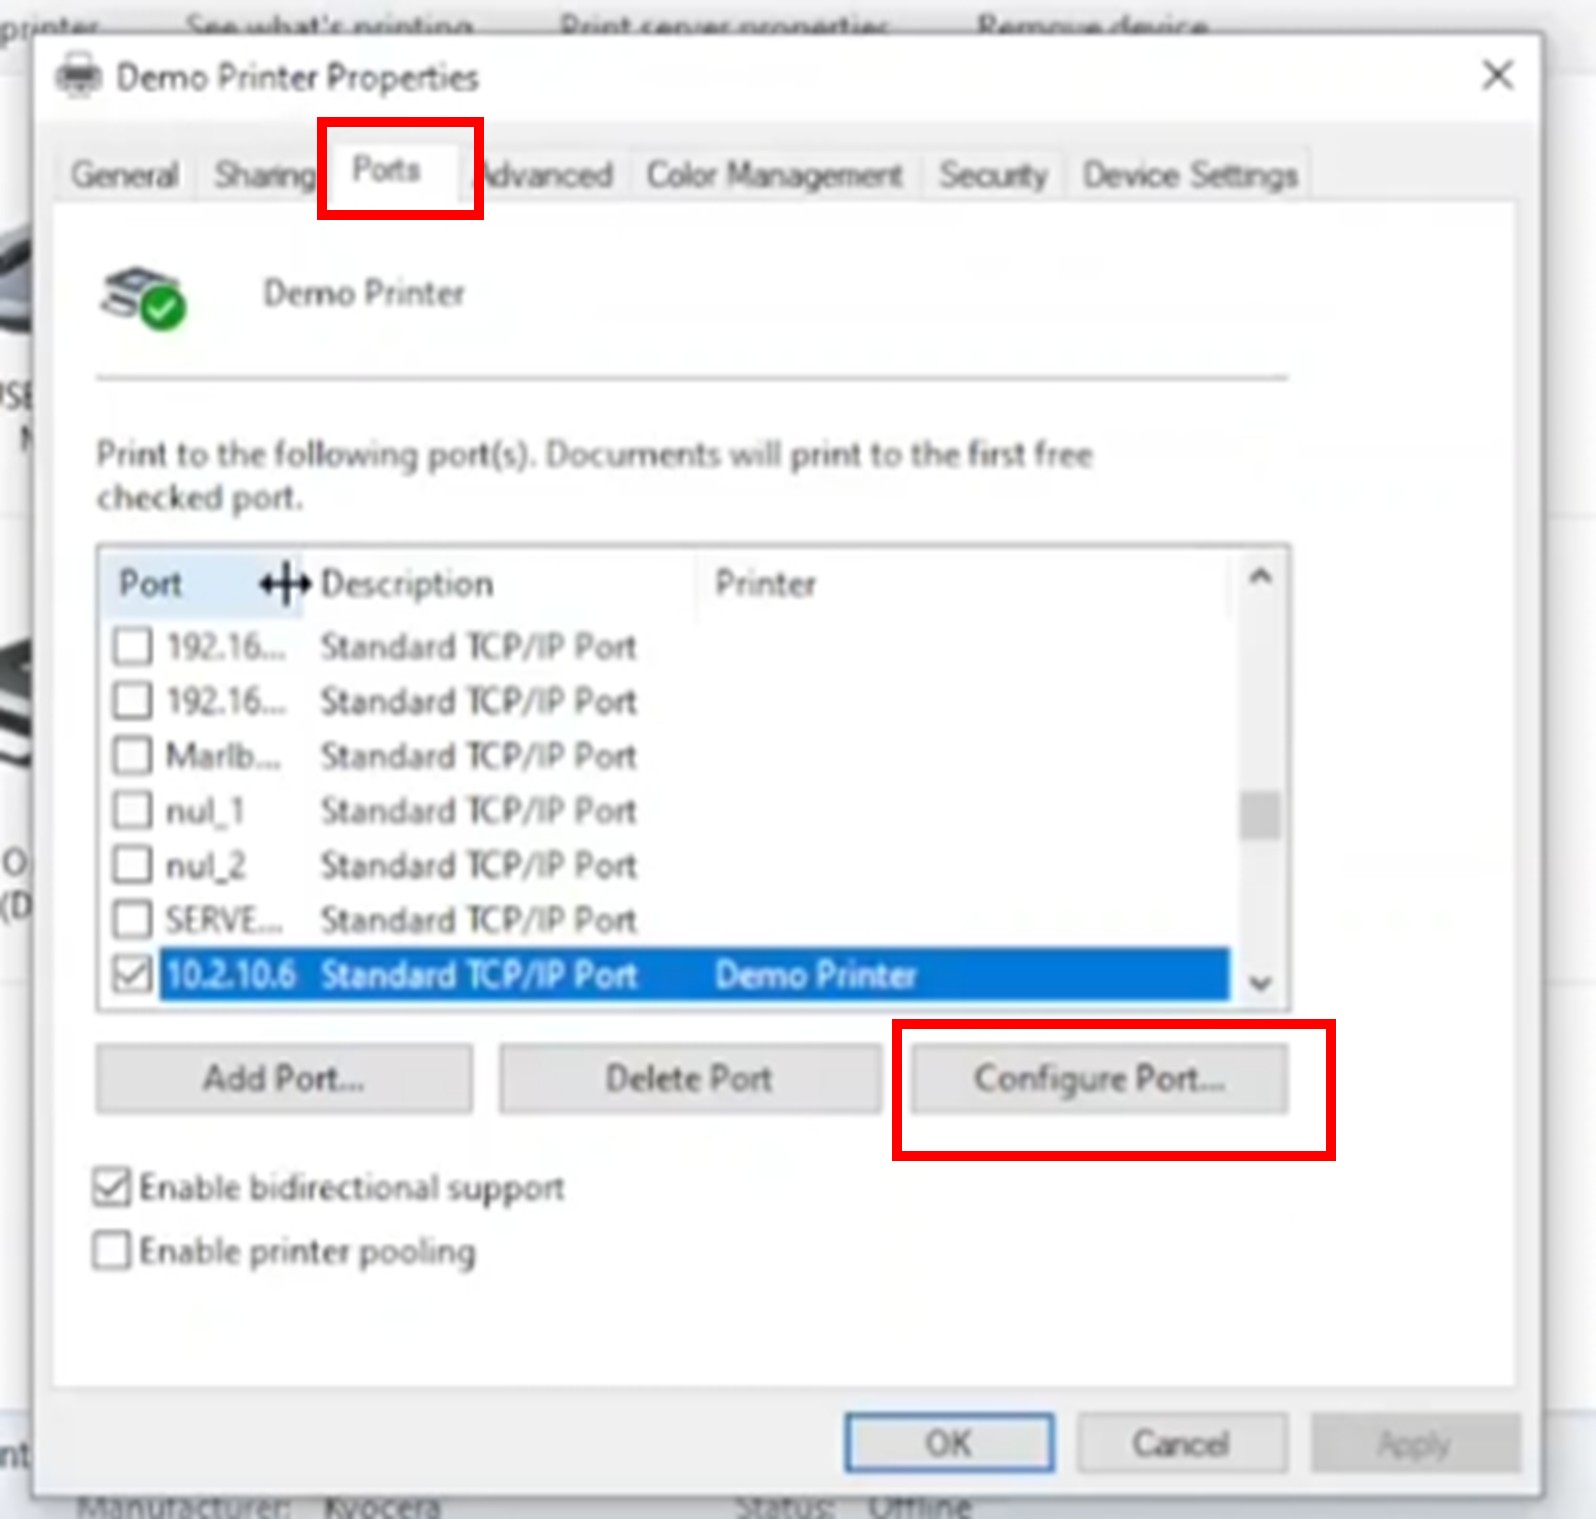
- Once in Devices and Printers, right click the printer that is offline, and select “Printer Properties”
- In the window that pops up, select the “Ports” tab and then select “Configure Port.”
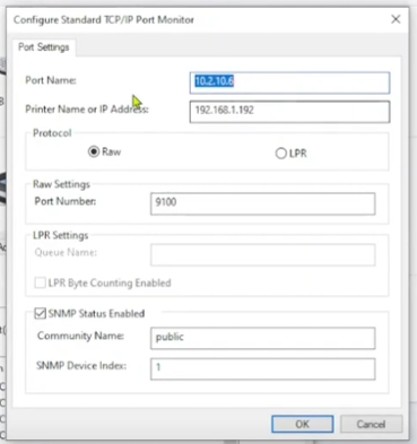
- In the next screen, enter the new, correct IP address in the “Printer name or IP address” field, and then select “Ok.”
- Once the new IP address is entered, if we did everything right the printer should come back online!

Learn more: What is a printer port?
How to delete a printer port: https://bdsdoc.com/kb-articles/how-to-delete-a-printer-port-in-windows-11/


