Here is a brief video from Sam on the basics of how to use Private Print. Please note that in order to permanently enable private print, you must enable it within the printer object by following the steps below this video.
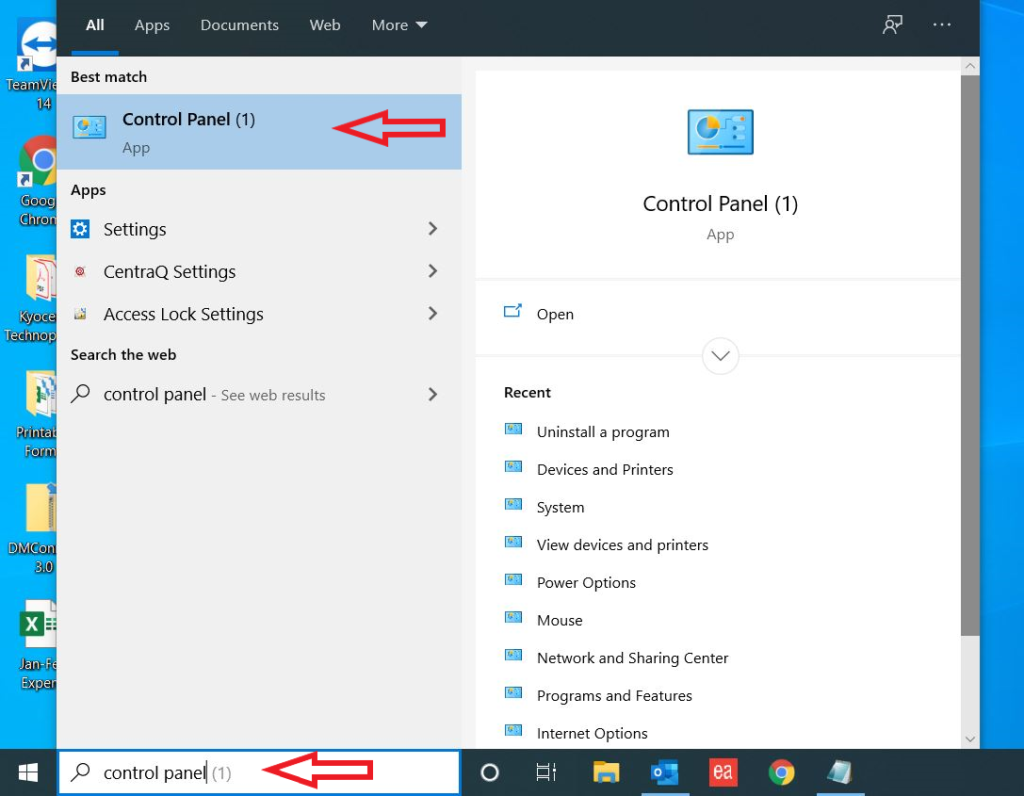
1. Open the ‘Control Panel’ #
(You can open the search bar or start menu of Windows 10 and type ‘Control Panel’ to bring it up)
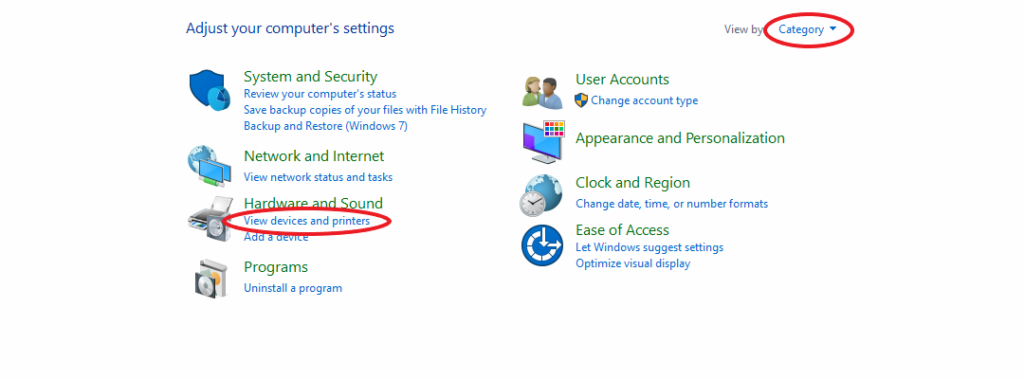
2. Press ‘View Devices and Printers’ #
(If you can’t find it, sort by category and your screen will look identical to mine)
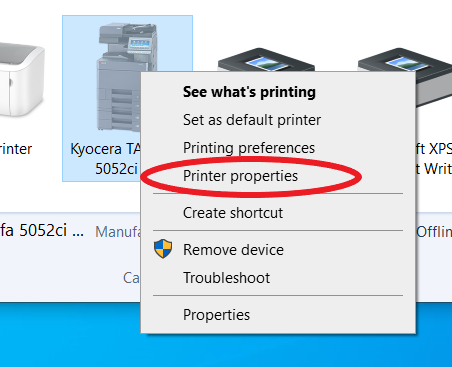
3. Right click on the desired printer and select ‘Printer Properties’ #
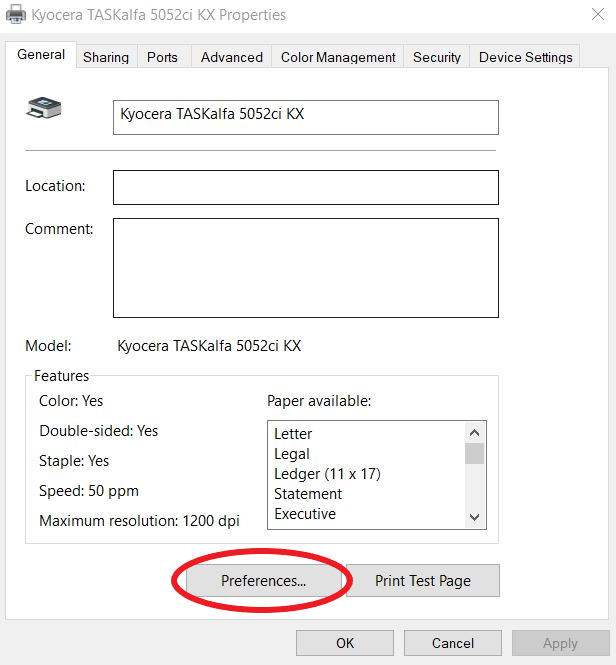
4. Press on the ‘Preferences’ button #
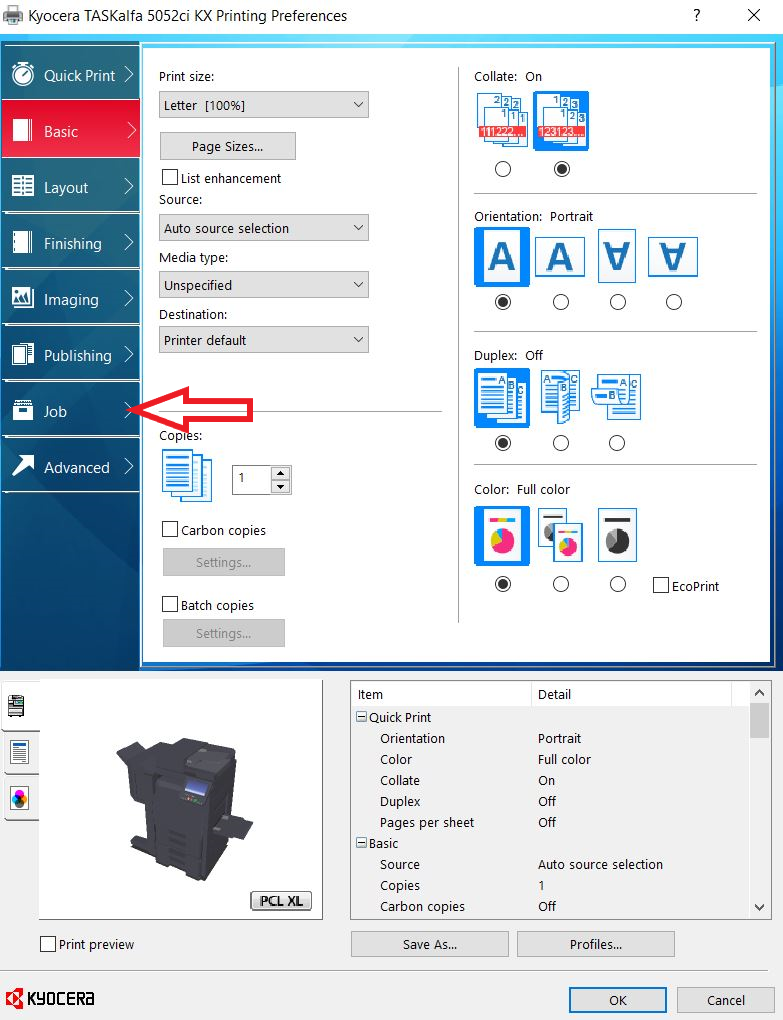
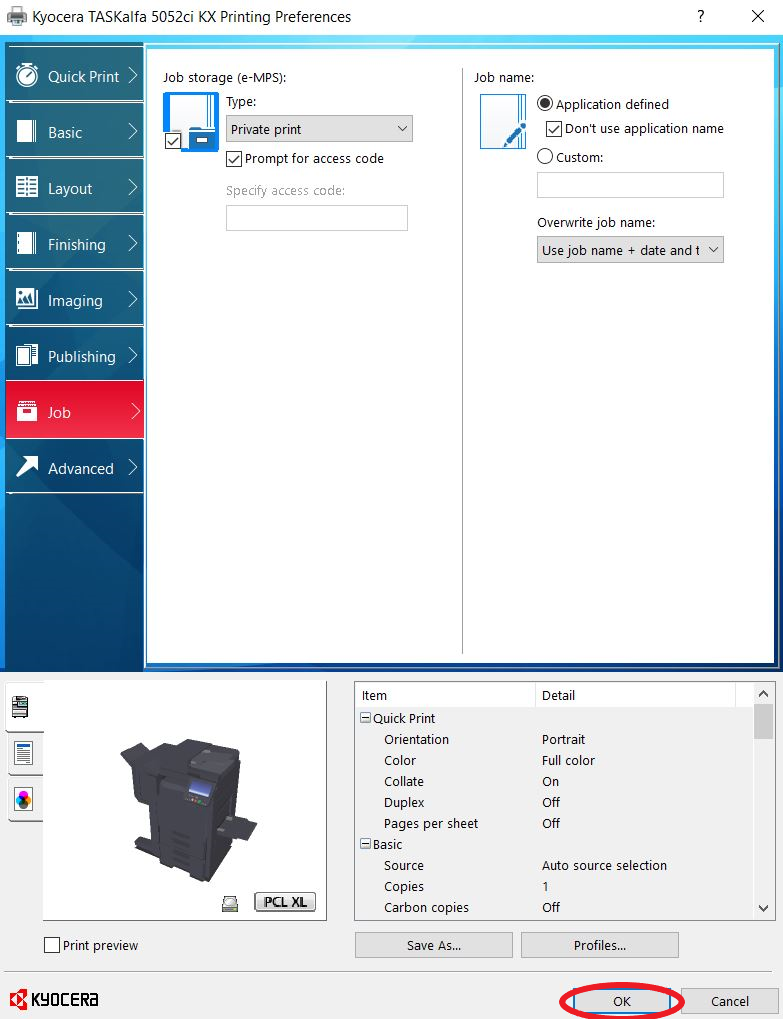
5. Click on the ‘Job’ tab #
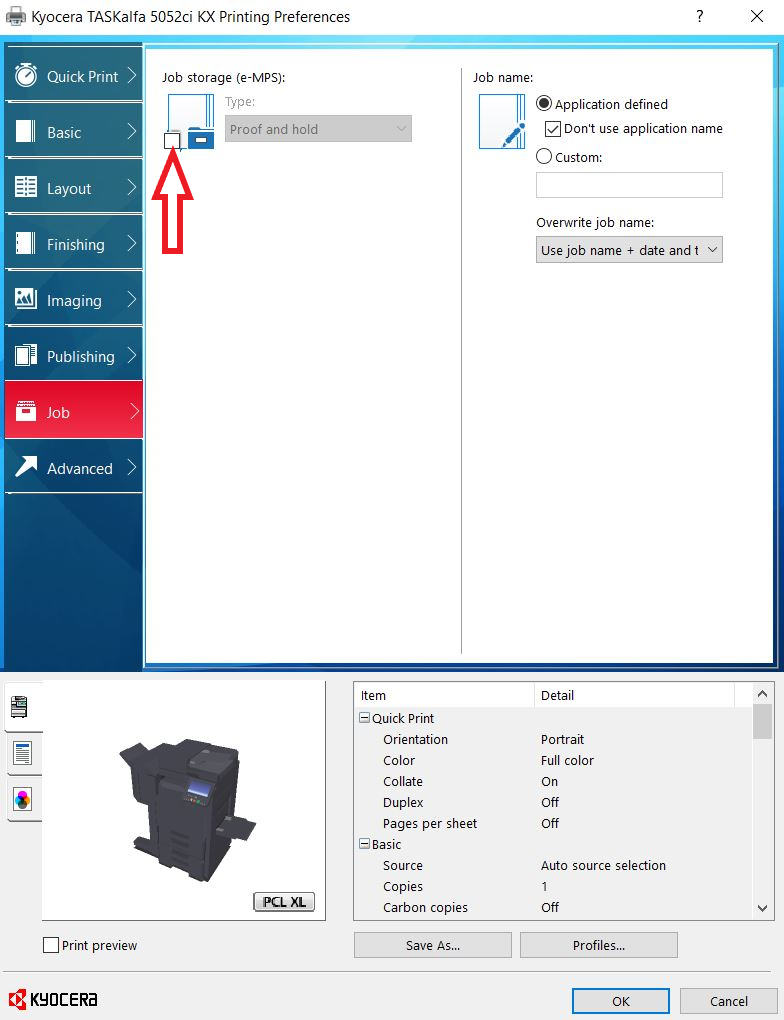
6. Click on ‘Job Storage (e-MPS)’ box #
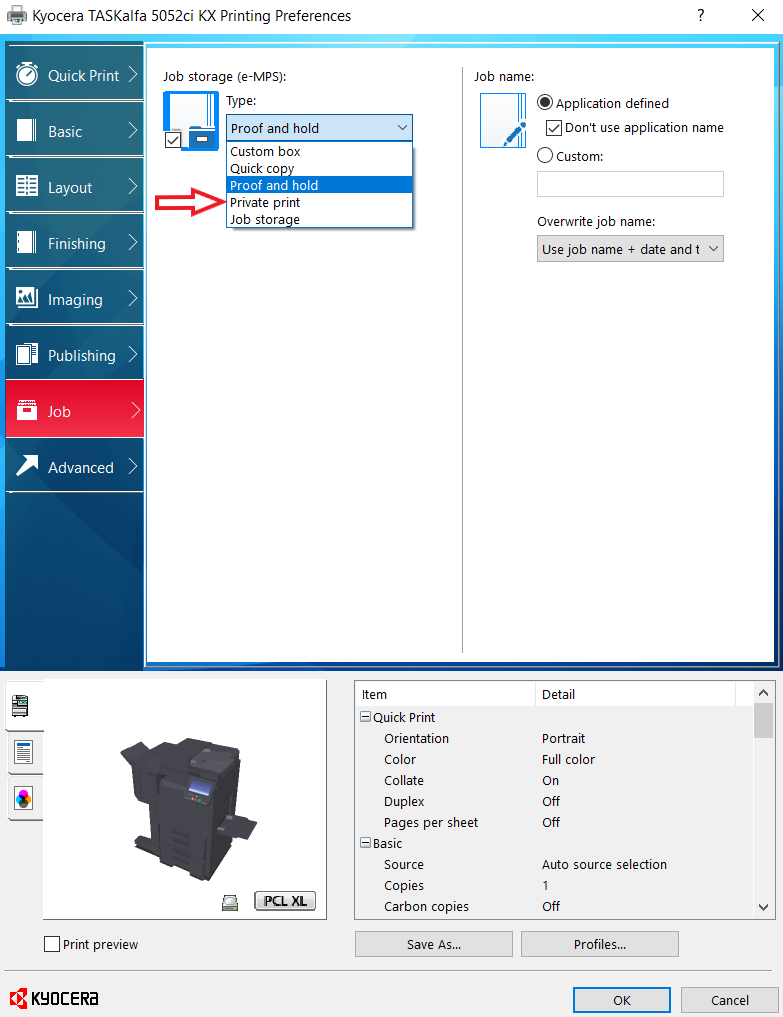
7. Click the drop-down menu and select private print #
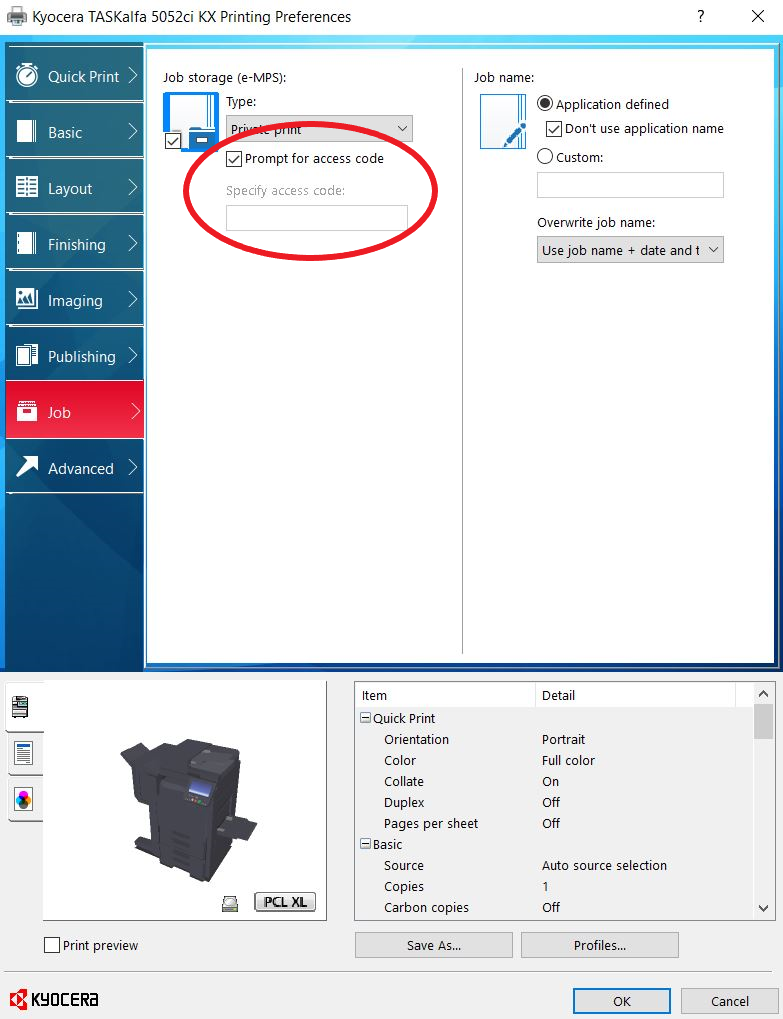
8. Choose whether to prompt for access code on printing #
(Leave ‘Prompt for Access Code’ checked if you want to type in the code every time a user prints or uncheck it and type the code in the box below for easier workflow)
9. Press ‘OK’ #
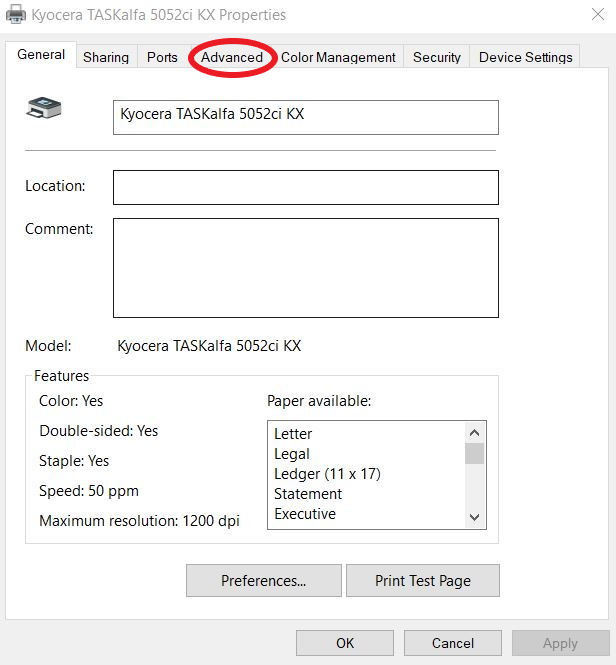
10. Press the ‘Advanced’ tab #
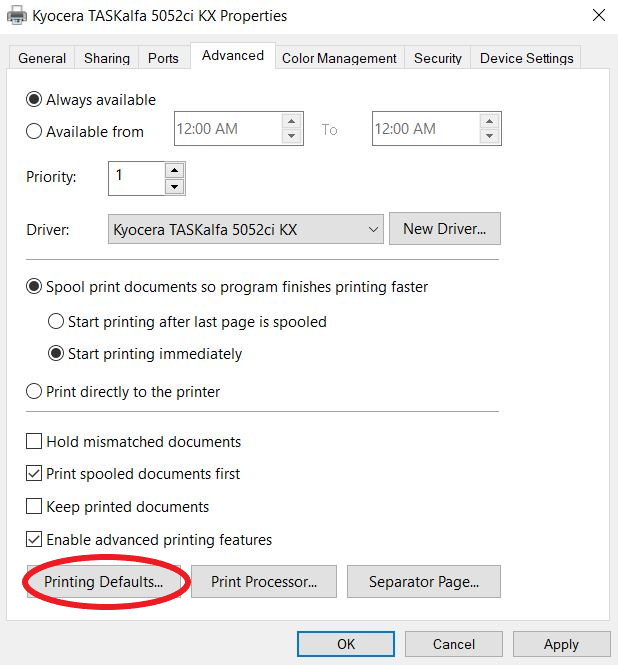
11. Press the ‘Printing Defaults’ button and repeat steps 5-9 #
12. Press the ‘OK’ button #
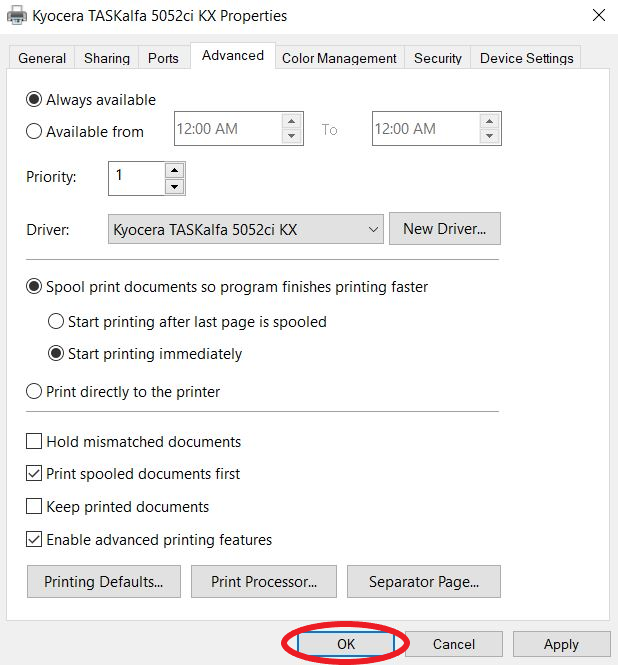
You’re done!


