The purpose of this article is to review the Custom Box and how it can be used in your Kyocera Printer Setup to store printing solutions. The custom box represents a printing solution where an end-user can print to a custom box where a document will be stored for later printing. Custom Box setup works in multisite environments.
There are two parts to settings up the custom boxes. Part One is done from the workstation that the printer is deployed from and Part Two is done from the web interface of the copier. Above, you will find a helpful video from Sam on the same topic discussed below.
Part One: Setting up the print driver #
The first step is to build the custom box. Enable the print driver to see the custom box solutions. Once that is complete, we will walk through printing to a custom box and collect that document from the custom box.
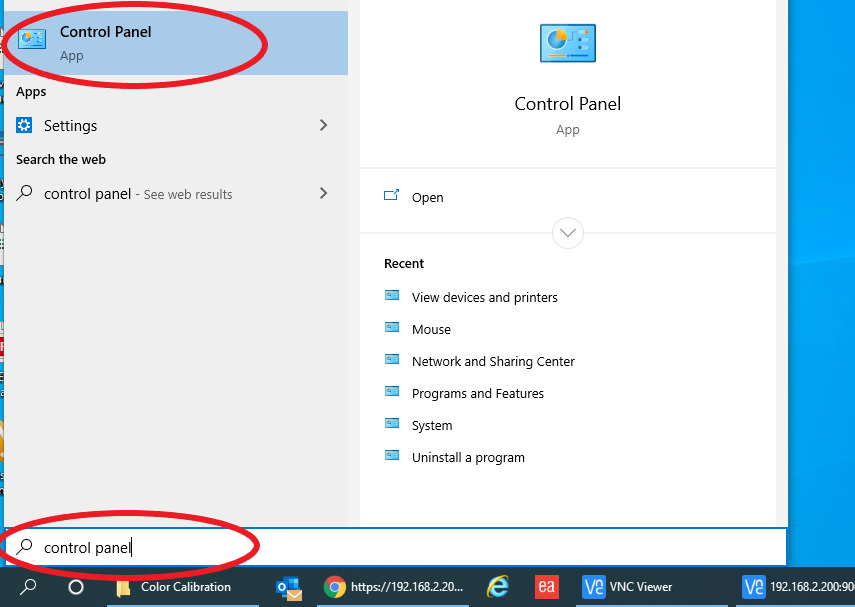
1. Open the ‘Control Panel’
(You can open the search bar or start menu of Windows 10 and type ‘Control Panel’ to bring it up)
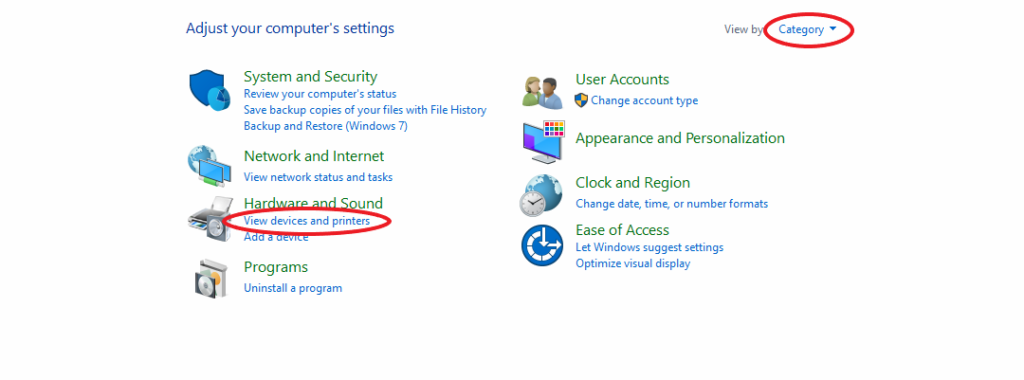
2. Press ‘View Devices and Printers’
(If you can’t find it, sort by category and your screen will look identical to this)
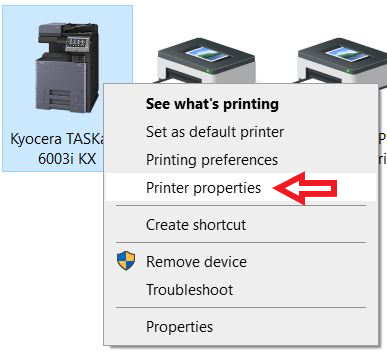
Right-click printer and select ‘Printer Properties’
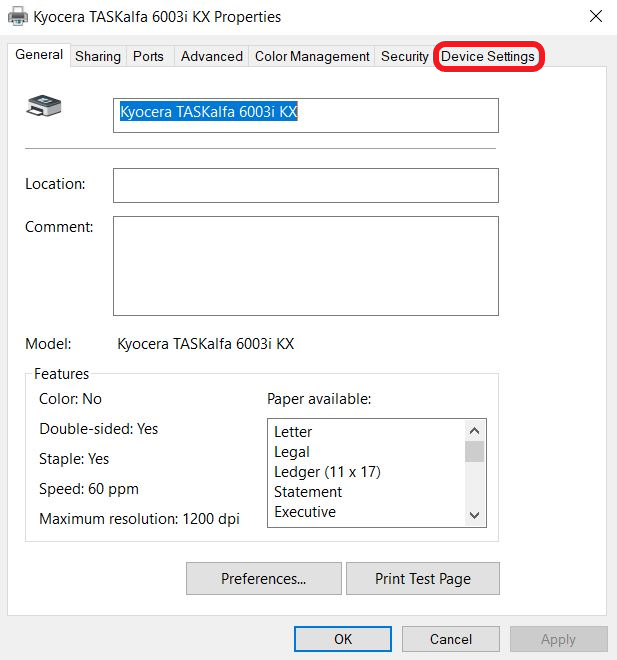
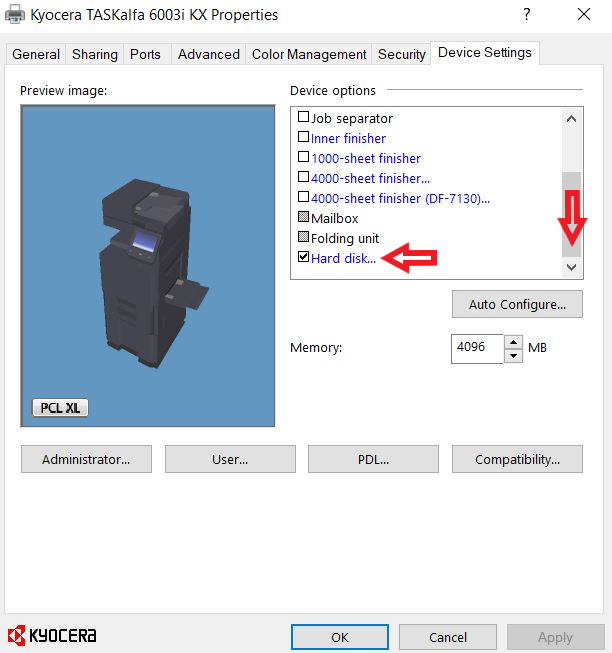
4. Press the ‘Device Settings’ tab
5. Double click ‘Hard Disk’
(You may have to scroll down in order to see Hard Disk listed)
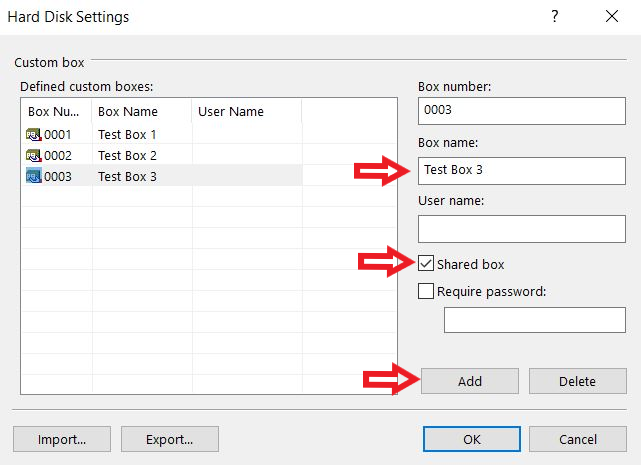
6. Press ‘Add’ and fill out custom box settings
(Exact capitalization, spelling, and order of the custom boxes will need to be remembered for later. You will want to make sure the shared box is checked. No user name or password is required unless desired. Press ‘OK’ when finished.)
It is important to remember your box name.
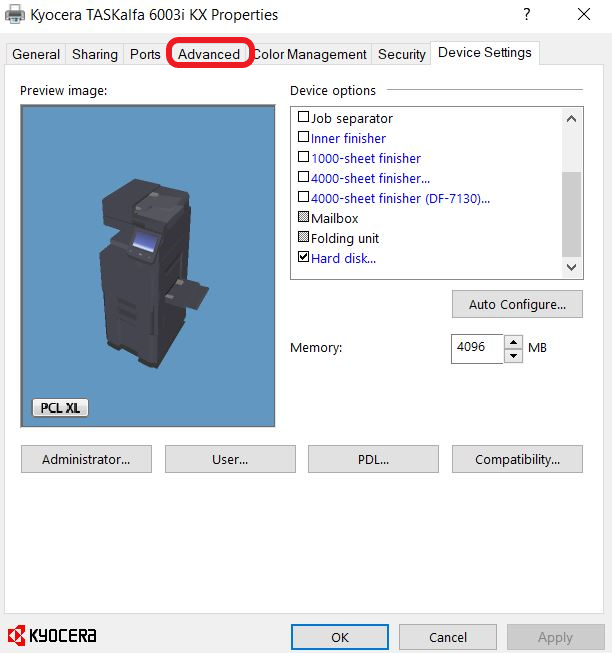
7. Press the ‘Advanced’ tab
We can take a few steps with the setup of this box. For instance, we can increase this box’s storage space. Additionally, we can set a password for this custom box to enhance security.
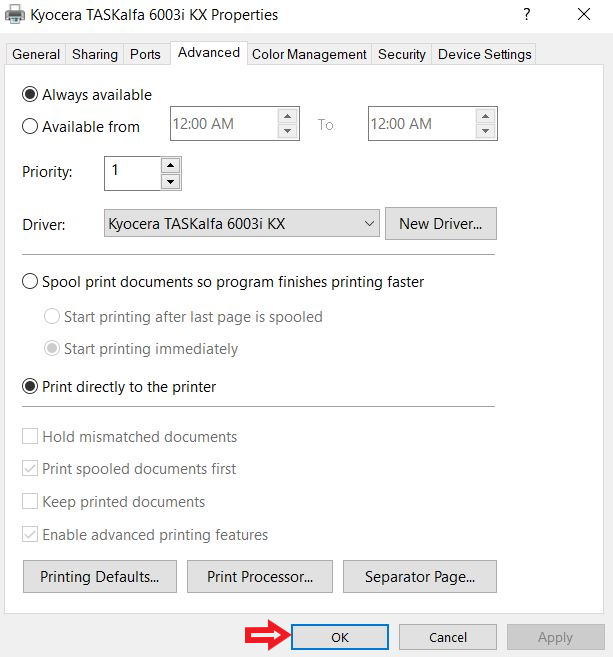
8. Check ‘Print Directly to Printer’ then press the ‘Printing Defaults’ button.

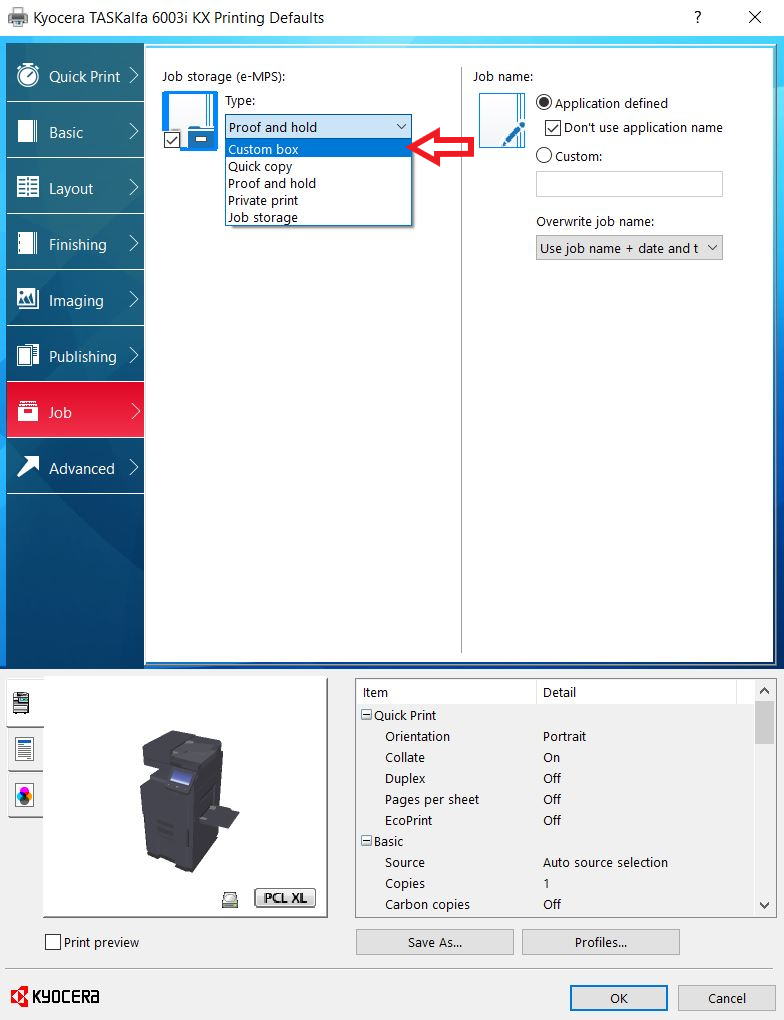
9. Press the ‘Job’ tab
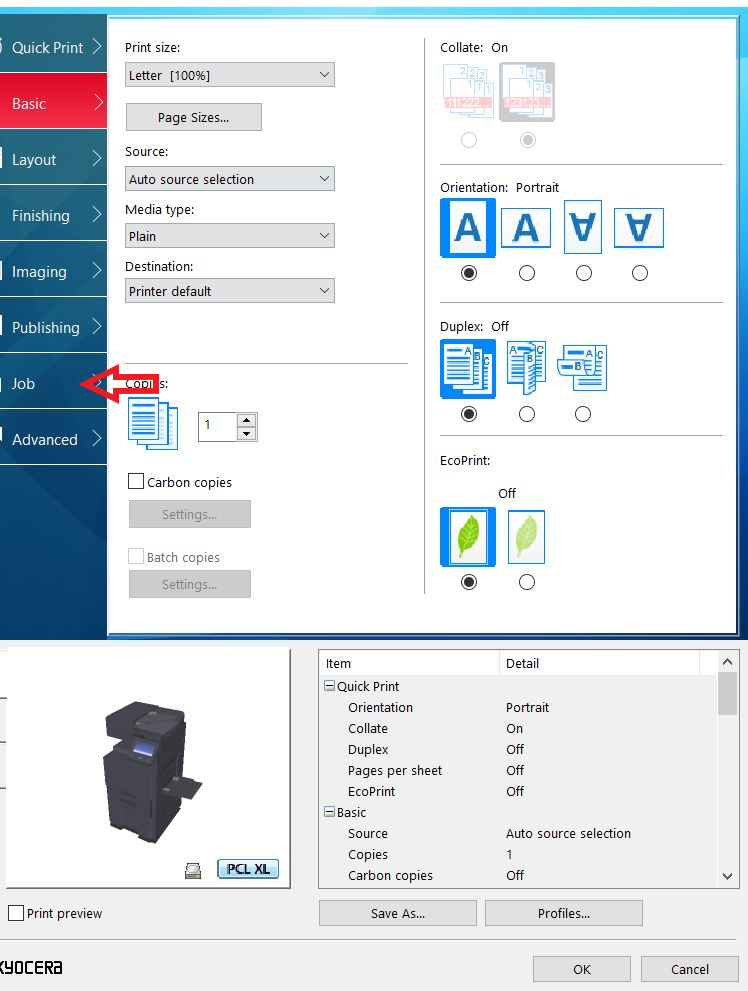
10. Check the ‘Job Storage (e-MPS)’ box and select ‘Custom Box’ from the drop down menu
(Press ‘OK’ when finished to close the print driver and save the changes.)
11. Press ‘OK’ to save and close ‘Printer Properties’
Part Two: Machine’s Web Interface #
1. Type your machine’s IP address into the URL bar of a web-browser
(If you do not know your machine’s IP address, see our guide here: How to find your IP address)

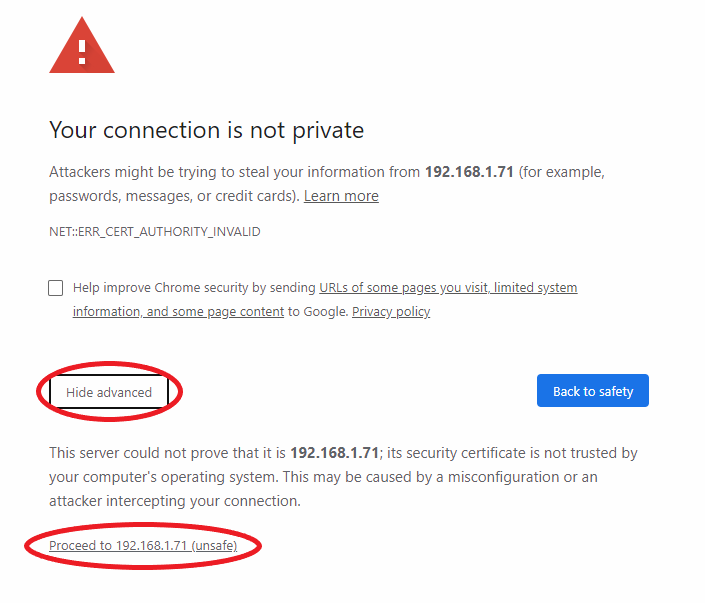
2. You will receive a certificate error. Press ‘Show Advanced’ and then ‘*Proceed to *Your IP address*’
(This example is from Google Chrome. If using another web browser, your certificate error will look slightly different. Just make sure to proceed to the site.)
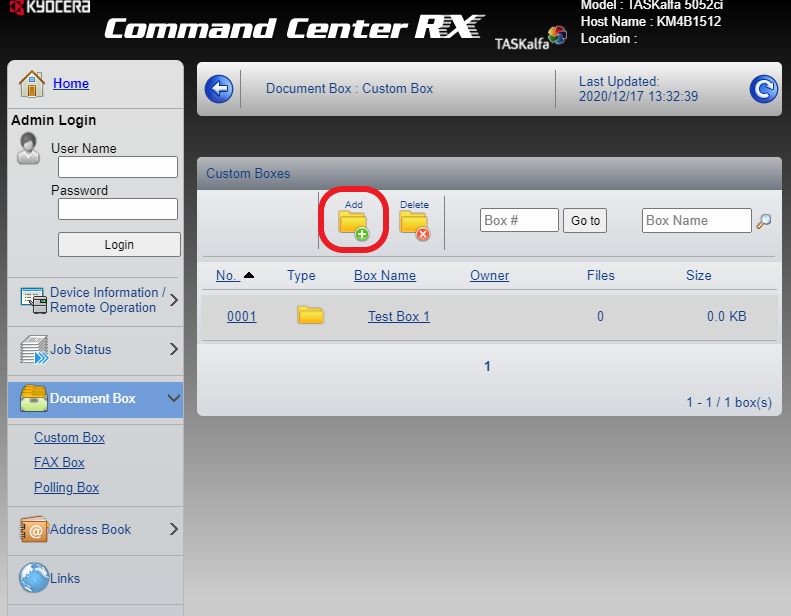
4. Highlight ‘Document Box’ and click on ‘Custom Box’
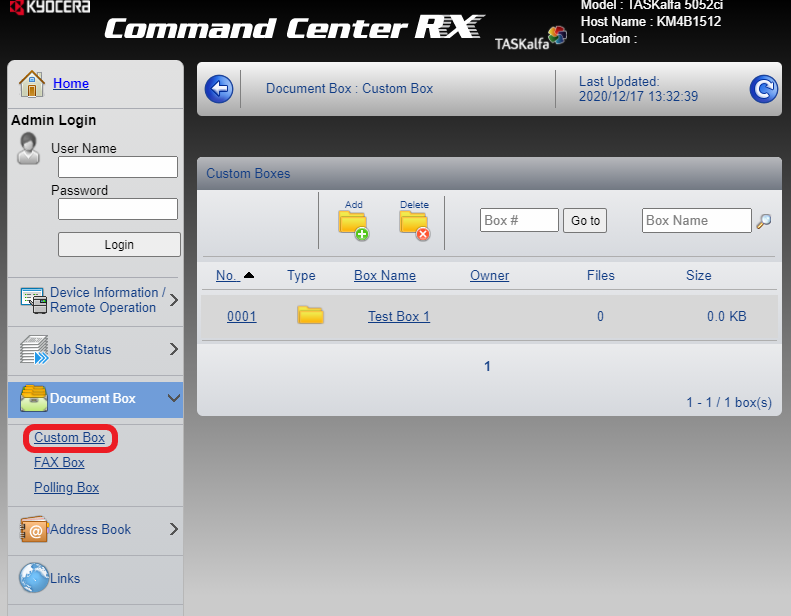
5. Press ‘Add’
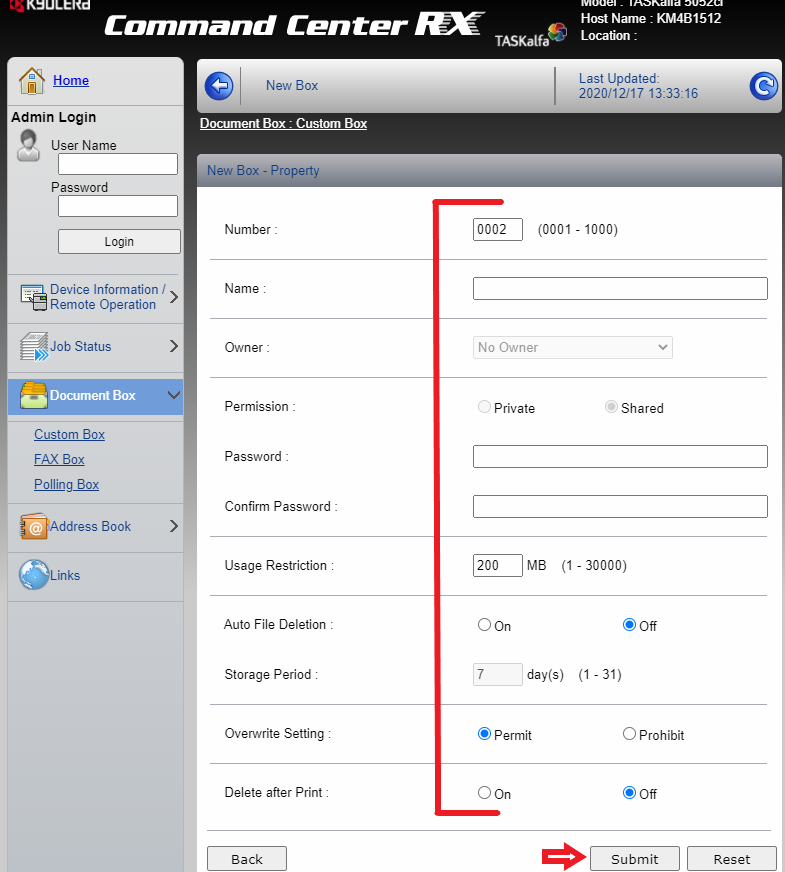
6. Fill out the necessary settings and press ‘Submit’ when finished
(Exact capitalization, spelling, and order of the custom boxes will need to be matched to what was filed out earlier in Part One, Step Six.)
7. Repeat step 6 until add custom boxes are added.
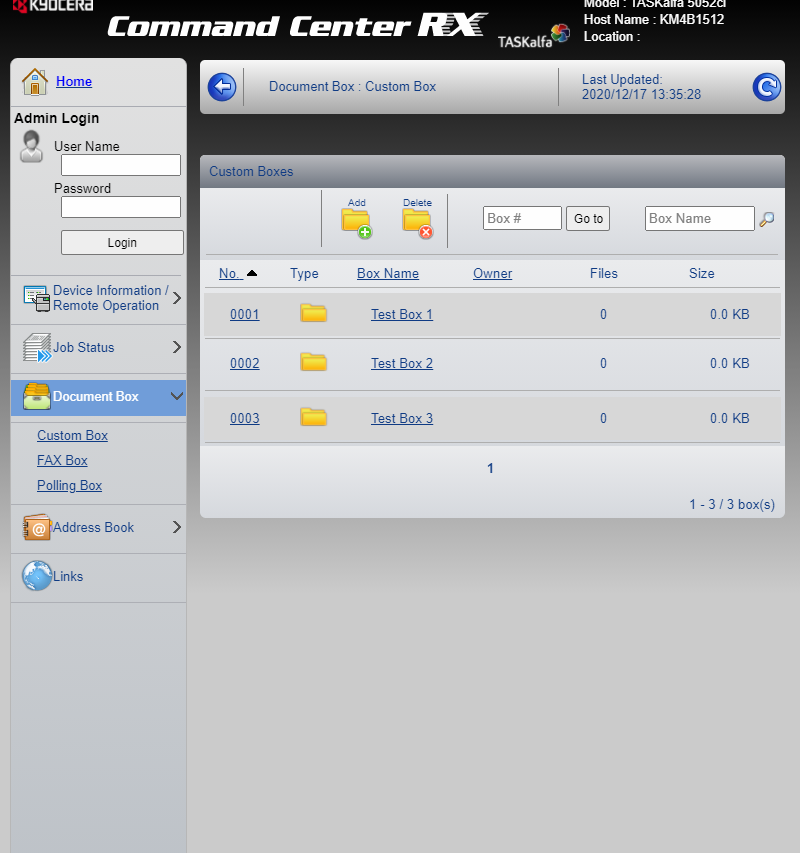
You’re finished! You have now set up your custom box on your Kyocera printer.


